Showing posts with label altered item. Show all posts

Sunday, March 31, 2013

Honey Bee Box

My Stampin' Up Demo, Chris Galbraith challenged her customers to get creative with this box she put in our orders a couple months back.   I missed the next stampin' class due to Soccer Mom duties, but brought in my little creation to show and tell this past class.   Here's what I made.  


Supplies: 
Stamps: Stampin' Up (Nature Walk)
Ink: Memento Ink (Tuxedo Black), Stampin' Up for shading. 
Coloring: Copic markers
Paper: Stampin' Up DSP (Botanical Gazette), Stampin' Up cardstock
Tools: Creative Memories (octagon shape maker), Stampin' Up embossing folder (Honeycomb), Tim Holtz/Sizzix Rosette Die
Accessories:  Hemp Twine


Tuesday, January 1, 2013

Happy New Wine Glass Charms

Happy New Year.   

The Bombshell Stamps December blog hop got pushed out a bit to make room for the holidays.  However, in the holiday spirit, the theme is "Make It a Gift." Given that the new year is upon us and I might just need to be able to locate my wine glass among the others in the room, I chose to make some wine glass charms.

This first set of charms uses Bombshell Stamps' Harley Bikes set.


 The image is stamped on 1 3/4 inch punched circles of Shrinky Dink material using Stazon' ink.   I then colored it on the revers side using Sharpie markers. Here are a couple of close ups.


My daughter helped me with a second set made with the butterflies from Bombshell Stamps' Queen Butterfly set. 


I think the butterflies turned out even cuter than the motorcycle ones. 


BLOG ROLL -
Thank you for visiting and hop on to the next blog.


Tuesday, September 11, 2012

Cuttlebug Cutting Pad Storage

My last post was a foam core creation and by happenstance, this one is too.  


It has two slots to hold my cutting pads.  The front holds my more commonly used pads and the back holds some shims, crease pad, embossing pads, etc...


Here's a closer look at the two compartments.


The box is dressed in some Stampin' Up DSP - Play Date.  I used a Fiskars punch for the scallop accent on the wrapper.  The medallion is made using SU's largest Scallop punch for the blue background.   I cut the rosette using Tim Holtz's 12 inch die and some circle punches (Creative Memories and EK Success).


The bottom of the box has a layer of specialty paper with this suede feel that I picked up ages ago on clearance at JoAnn's.


And here's a pircute of where this little box lives at my cutting station.   


Monday, August 6, 2012

Bag Tags

Today is the first day of school for my little ones.  Each year I make a luggage tag/bag tag for their backpacks.  I try to coordinate with the pack.  On one side is their name and on the other side is their contact info.  I use these great plastic Bag Tag laminating sleeves by Scotch.


And here's a picture of my 3rd and 5th grader.   Time is flying by.


Here they are with their new backpacks loaded down with school supplies. It's crazy how much we have to send in.   We couldn't even fit it all in those large backpacks.  They each had to carry in another bag of supplies.  


Supplies: 
Angeline's Bag Tag: Basic Grey (Green at Heart)
Spencer's Bag Tag: 7 Gypsies printed paper (Venice 6x6)
Both Tags:  Stampin' Up ink (for distressing), Stampin' Up Cardstock (middle layer), Recollections silver sparkly paper, Make the Cut (to design the cutting file - their names) and KNK Zing to cut, EK Success corner rounder

Wednesday, May 16, 2012

Teacher's Appreciation Week - Part 2

If you didn't get to see Monday's post, take a minute and look back.

Here's the gift we put together for my son's teacher.  It's a recipe card box.  The box itself is by CTMH and I altered it using paper by 7 Gypsies.   The book sitting behind the recipe box was my inspiration.  It's a binder in which I keep my recipes and I had some matching recipe cards that I wanted to use for this project.  I added some ribbon and metal accents. I believe those metal accents are by EK Success, but it's been a while since I purchased those.  I don't store my supplies in their packaging.  


Here's a picture of the box filled with cards along with the recipe cards and dividers.  I made the dividers using red Stampin' Up card stock and labels punched from the 7 Gypsies cardstock using the Stampin' Up flower petals punch.   My son picked out all of greeting cards that filled up the rest of the box.


Here's a picture where you can see the inside of the box and the recipe cards along with the dividers.   I used Gaffer tape to reinforce the hinge.   The Gaffer tape is also from 7 Gypsies.  I used Mod Podge to adhere all of the paper to the box, but I only covered the back of the papers.   The outside of the box feels like paper and doesn't have a sheen.


Here's a close up of the inside.  I tried to finish off the box nicely on the inside too so it would be enjoyable all the way around.


Monday, May 14, 2012

Teacher's Appreciation Week - Part 1

Last week was Teacher's Appreciation Week at our school. When I taught card making classes at the school the week before, my daughter's teacher mentioned a gift of cards she once received and how she cherished them.   The hint was well received and we made her a gift of cards. 


I wish we would have had more time for my little 8 year old girl and I to collaborate or more cards.  Here are three cards that's the product of both of our efforts. Angeline stamped and colored these gorgeous images.  I finished them off into cards that we ended up including in the teacher's gift. The set is called Holiday Lineup by Stampin' Up.   I used some Stampin' Up designer series paper, Stampin' Up Cardstock and some printed scrapbook paper by K & Company for the rest of the card.   So these three cards were included in the tin and Angeline got to pick from the my stash to fill up the rest of the tin.

I also have to tell you a little story.   I have a very talented friend in Texas that's also a Stampin' Up demo, Joan Robertson.  She has a fantastic blog that you should check out. Clicky  We met through an online board called Scrapshare and I've had the pleasure of scrapping with her at retreats.   She had a little contest recently and the winner could pick from one of her retired stamp sets.   Well, I won and just knew Angeline would love this set.  Sure enough, she did.  She was giddy when it arrived and couldn't wait to stamp and color.   Thank you Joan for your generosity.


I picked up the tin from Hobby Lobby.  The top half of the tin was colored using alcohol inks by Ranger/Tim Holtz, The paper on the bottom half of the tin is Designer Series Paper from Stampin' Up.  The flowers are Prima and the brad in the middle of the flowers is by Stampin' Up.   I picked up the ribbon at a craft store and don't recall the brand.   I unpackage all my ribbon unless it's a larger roll like Stampin' Up.  The paper is applied with Mod Podge.  I added the ribbon using Scor Tape.  I'm loving Scor Tape.  It's a great product.  It really sticks and is so easy to use. The flower is held on with a combination of Scor Tape and Glossy Accents by Ranger/Tim Holtz used as an adhesive.

The divider cards that you can see in the first picture above were made from Crate Paper printed scrapbook paper, a corner rounder, and Stampin' Up's tag punch. 


Here's a close up of the tin. 


Check back to see what my son's teacher received.


Sunday, March 4, 2012

Baby Disney Baby Shower Goodies

I've been busy working on decorations for a co-worker's baby shower.   I've never made a diaper cake and thought this was the perfect opportunity to give it a shot.    After watching a couple of YouTube videos I thought I had all the knowledge I needed.   Well, there is a bit of trial and error involved.  

I hit Costco for a monster size box of diapers.  Ooops... that was too many diapers.  So I made two cakes and have some to spare.   Plus, I didn't even think about the Costco diapers having a pattern on them instead of pure white.   Ooops again, but I just rolled with it.... literally....  I rolled up a boat load of diapers for the three tiers on each cake.  I used some blanket binding I had left over in my sewing stash and decorated with paper piecings I made using Make the Cut software and my KNK Zing.   The starburst (firework) topper has punched Mikey heads made with my EK Success paper punch.


I made a large 8x11 card for everyone to sign at the shower and used another paper piecing for a little card just from me.  The large card has an embossed layer that I made using my Cuttlebug embossing folders.   The Gingham paper is Creative memories and the stripe is Paper Pizzaz from my stash. 


Lastly, I made some cake toppers with four of the paper piecings.   I just added popsicle sicks to the back of the paper piecings and we can poke them into the cake.


I have one more thing to make for the baby shower decorations and that's a banner.  Guess what I'll be working on in the next couple of days.  

Monday, February 13, 2012

Porcupine Bow

Here's a fun bow to make with some scrap wrapping paper.   I remember learning how to make this when I was a teenager, or maybe a tween.   It's still fun today.  Here are a couple of pictures.  Given the pattern wrapping paper I used, this porcupine bow almost wants to camouflage into the background.


Thursday, January 26, 2012

Angry Bird Smooshed Bottle Cap Magnets

I checked two large (like warehouse large) party supply stores in area for Angry Bird party favors.  Between both stores, I found one pack of cocktail napkins and one stack of drink cups.   No party favors at all.   Thus, we were left to our own devices.   We made some smooshed bottle cap magnets.   See the tutorial I posted earlier this month for instructions on how to make these.  The only additional step was to glue a magnet to the back of the bottle caps.   


I used Make the Cut (MTC) software to create the image and load the print and cut file to my KNK Zing.  The laser alignment on the Zing worked great.   I adhered the faces to a 1 inch circle of red cardstock.  


Wednesday, January 11, 2012

Smooshed Bottle Cap Accents

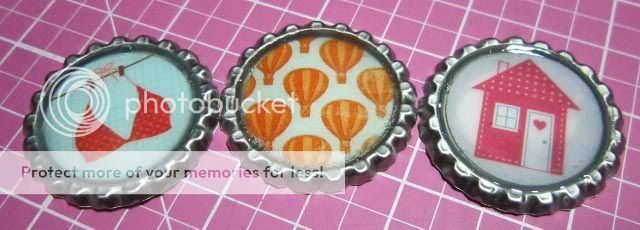
I saw this idea on the web a few months back and asked my hubby to pick up some bottle caps next time he went to the brew supply store.  He went tonight and he didn't forget about my request.  He came home with a bag full of clean bottlecaps.   Here's what the kids and I made....   They're accents that we can use to make cards, scrapbook pages, necklace charms or just about anything that strikes our fancy. 


I chose the little house (paper by Stampin' Up - 6x6 Welcome Neighbor DSP from an Occasions Mini, I think two years ago).  Spencer's is the orange hot air balloons (paper by My Mind's Eye - Lime Twist 6x6 pad).  His favorite color is orange.  Angeline... well, we have issues to work through.  She got a chuckle out of picking the bra (um bikini top) (paperr from Jillibean Soup - Watermelon Gazpacho 6x6 pad).

After making those three gems, I couldn't resist and wanted to make a couple more.   And since I was at it, I took some pictures so I could share with my online friends as to how to make these.   Mind you, these could get pricy if you buy them in the scrapbook store.  However if, you pick them up at a brew supply store or hardware store, a bag of a 100 of these is just a couple of bucks.  Now I understand that you can't just use a bottle cap off of the beer you enjoyed with dinner.   The steel on those is much too hard and they won't compress as easily as the ones from the hardware store or brew supply store. 

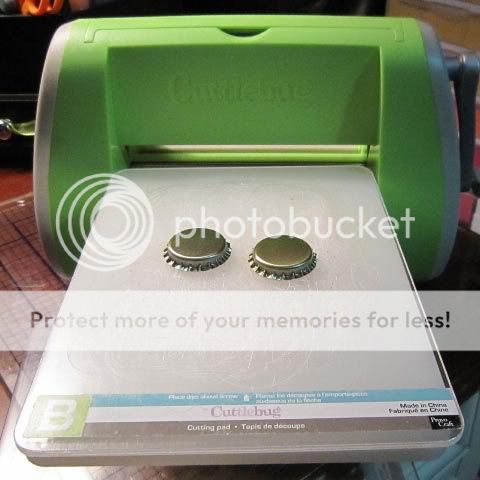
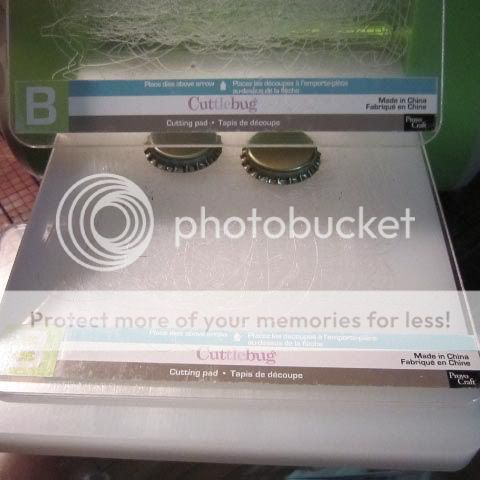
Step 1:  Use your Sizzix or Cuttlebug to smoosh the bottle caps.  


I used the big white A plate spacer and my two B plates.  That's the same set of plates that you use for a standard Sizzlet or Cuttlebug die.


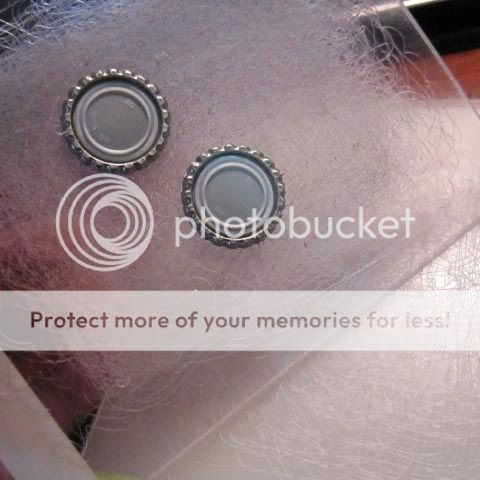
I sandwich the bottle caps in between the B plates on top of the A plae spacer.   Run the sand through the machine and you get some great flattened bottle caps.


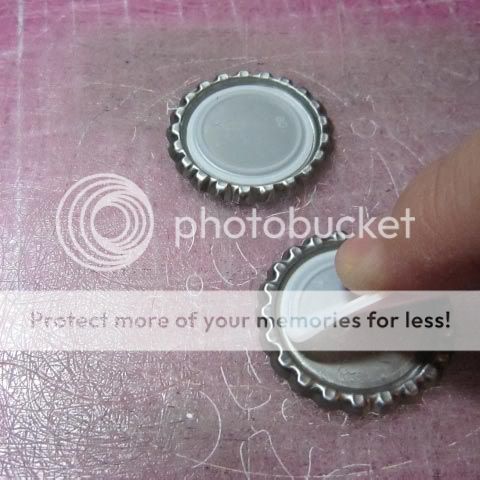
Step 2:  Peel the plastic gasket from the inside of the bottle cap.  I use my bone folder to help grab a hold of the rubber and it comes out quite easily.  Don't worry too much about cleaning any goop out of the bottle cap.  You're going to cover that with something pretty anyway.


Step 3: Select a printed paper or photograph and punch a 1 inch circle. I used my Creative Memories Shape Maker.


Sept 4: Adhere the punched out circle to the inside of of the smooshed bottle cap.


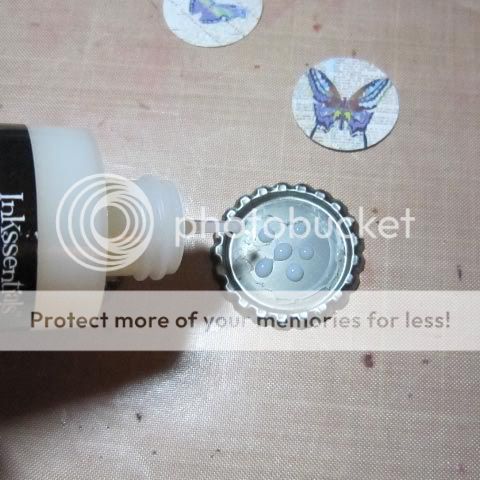
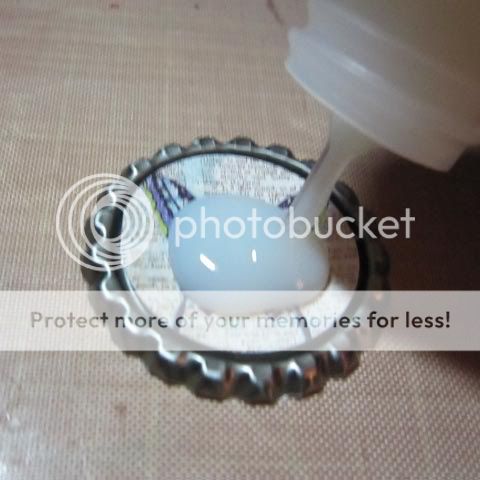
Just add a few drops of Glossy Accents by Ranger ( or Crystal Effects by SU, or Liquid Glass by CTMH, or similar product) and adhere the punched out designer scrapbook paper to the center of the cap. 


Step 5:  Apply the Glossy Accents liquid using the needle nose applicator on the product.


Using that needle nose, work the Glossy Accent into all of the crevices of the bottle cap, removing any air bubbles and pushing down the paper in the process. 


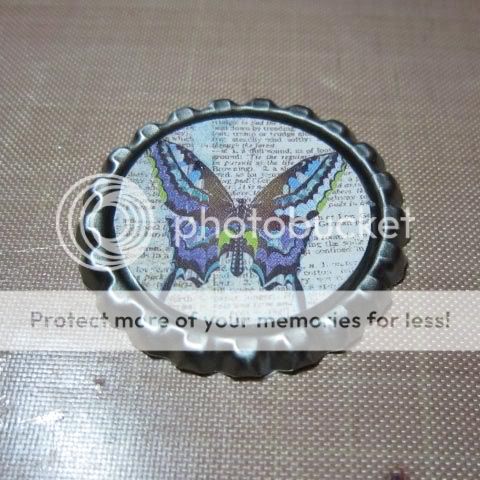
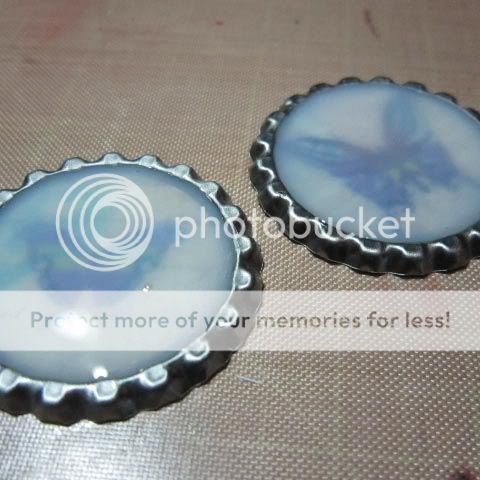
Let sit and dry.  The liquid will dry clear.   For an antiqued finish, there are some liquid accent products on the market that will dry with a slight antiqued tint. 


I hope you enjoy making your own smooshed bottle caps.  It's fun for adult and junior crafters.  Both of my kids loved making these earlier this evening.  I'm sure we'll be making more.   In fact, my son has a birthday coming up.  These'll make great accents for the thank you cards he'll be sending out to any party attendees.   :-)  

And after these butterflies dry, I'll have to make some cards and post those too.  


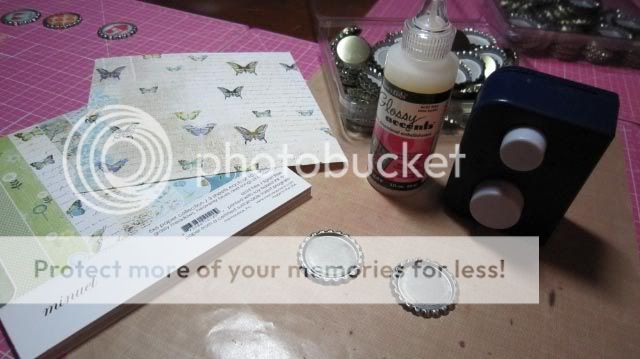
Supplies: 
Bottle caps from brew supply store or hardware store.
Cuttlebug, Sizzix big shot or other die cutting machine that can cut Sizzlette or Cuttlebug size dies. 
1" circle hole punch
Designer scrapbook paper or pictures.  I used a 6x6 print from Memorybox's Minuet collection.
Glossy Accents by Ranger ( or Crystal Effects by SU, or Liquid Glass by CTMH, or similar product)


Saturday, December 24, 2011

Golfer's Christmas Gift

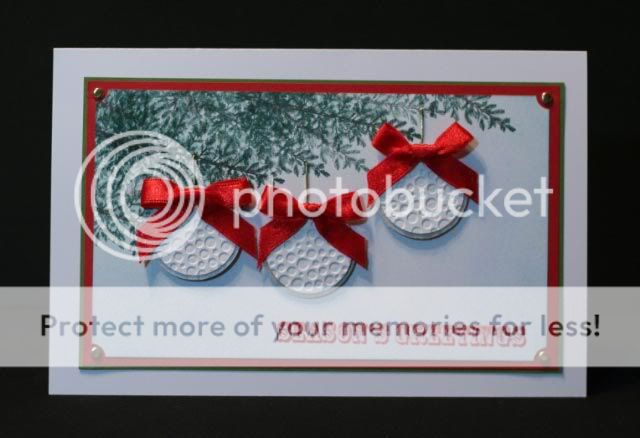
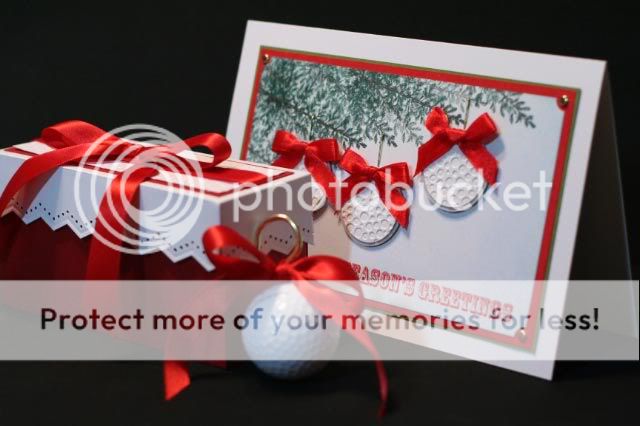
I changed job's this year and my new boss is a golfer.  The idea of these ornaments stared out as a joke idea, but then.... what the heck.  He can think of us year over year as he puts golf balls into a tree.   After all, I understand that golfers often put golf balls into trees.  Right? 

P.S. He also got a gift card to a golfer's pro shop.   


Supplies For Card:  
Stamps:  Stampin' Up (Lovely as a Tree), Hero Arts (Greeting - backgroudn stamp cut apart)
Ink: Stampin' Up
Cardstock:  Hammermill Coverstock, Misc Red and Green cardstock from Hobby Lobby, Creative Memories Silver Shimmer paper
Toos: Cuttlebug embossing folder, EK Success circle punch, Creative Memories circle punch, Stampin' Up tag corner punch
Accessories: Paper Studio gold brads, Misc. red ribbon

Supplies for Box: 
Cardstock: Bazzil (red), Hammermill (white coverstock)
Tools: Paper trimmer, Score Pal, Martha Stewart border punch, Cuttlebug embossing folder
Accessories: Ribbon

Golf Ornament: 
Golf ball, gold hooks with screw in, ribbon


Related Posts Plugin for WordPress, Blogger...