Showing posts with label Quickutz. Show all posts

Monday, September 9, 2013

Delicate Garden Butterfly

Here's that Martha Stewart mold again.  I dusted the mold with some sparkly white glitter before filling it with white clay.   It gave it a nice white shimmer.  Perfect for a wedding, anniversary, or christening card. 


Supplies: 
Tools: mold and clay (Martha Stewart), embossing folders (Quikutz)
Cardstock: Hammermill, Stampin' Up
Accessories: fine white glitter; dimensional adhesive. 

Tuesday, September 3, 2013

Devilish Layer Challenge


This month's Bombshell Stamps Pin Up, Jenn Cochran has issued a challenge to layer it up.   I took her up on her challenge and created the below card using the Cherry Bomb stampset from Bombshell Stamps.

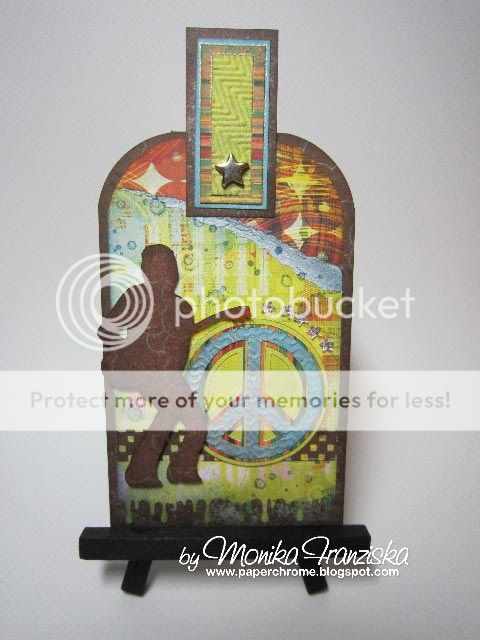
Here are 5 layers piled on nice and neat...  a striped stamped card base, and embossed white layer, a tea mat, another background stamped layer and then that wicked devil from Bombshell Stamps' Cherry bomb set.


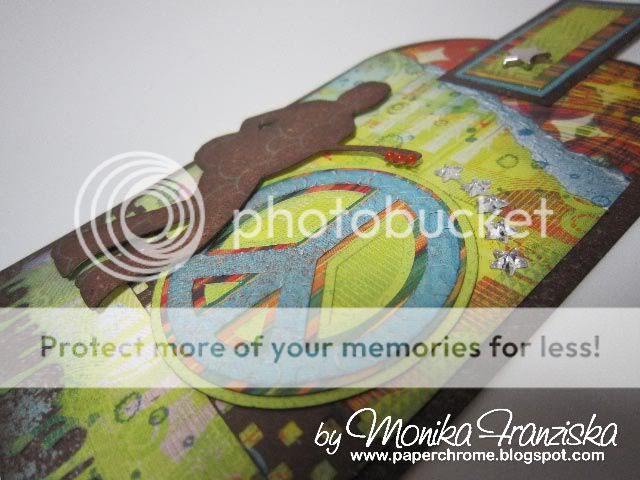
Here's a shot from the side and you can see the dimension.  Two sets of layers are adhered using some dimensional adhesive for eve more pop.  


Supplies: 
Stamps: Cherry Bomb (Bombshell Stamps), stiped background (Impression Obsession), Tin Pattern (Stampabilities)
Ink: Tuxedo Black (Memento): Cameo Coral & Bermuda Bay (Sttampin' Up)
Coloring: markers (Copic), markers (Stampin' Up)
Cardstock: Cameo Coral, Bermuda Bay, Whisper White (Stampin' Up)
Tools: Twirl embossing folder (Quickutz)
Accessories: red pearls, dimensional adhesive, ribbon (on the inside)


Sunday, June 2, 2013

Shake, Rev, and Roll

This month's Bombshell Stamps Pin-up is Sharon Rogers.  Her challenge this month was to create a card or project using acetate or vellum.   I used acetate to make a shaker box card.   See the gears and little beads floating inside of the card?


Suppliers:
Ink: Tuxedo Black (Memento)
Coloring: markers (Copics)
Printed Paper: On the Bright Side (My Mind's Eye)
Cardstock: Tuexdo Blac (Stampin' Up); white (Neenah), mirror cardstock
Accessories: acetate; micro beads (Martha Stewart); foam tape
Tools: gear dies (Quickutz)


Tuesday, March 12, 2013

Twinchie - Airplane Shaker


Another Trinchie Twinchie?   Yup.  This one is for the little boy group in JenniferD's swap on Scrapshare.com.  Instead of 2x2 twinchies, we're making 3x3 squares and I've been calling them trinchies.  


I used some Echo park paper, SU carstock, and a Quickutz die to create this shaker box.   The inside of the shaker box has mico beads.   The construction of the shadow box is a bit involved.   Here's how I made the front of the box.   I used some SU cardstock cut at 2 7/8 square and cut a square of pattern paper at 2 3/4 square.   Adhered those two together and used a slide paper trimmer to cut a square out of the middle.  I used a half an inch as my frame.  Then I adhered a 2 3/4 square piece of clear plastic to the back of the square.   For the base of the window, I used a 3x3 piece of cardstock and a pied of 2 3/4 square patterned paper.   Ad here those together and then use strips of foam tape to create a frame around the patterned paper.  make sure there are no gaps or those little micro beads will escape.   

I added an die cut airplane to the center of the shaker box.   The airplane is mounted on foame pop dots that are not quite as thick as the foam tape border.   Carefully pour in some microbeads.  I used clear as silver.   Then carefully peel off the top adhesive layer of the foam tape and apply the face of the shadow box.   Make sure the adhesive is adhered tightly and voila... you're done. 


Here are all four of the little boy airplane trinchies together.  You can see the effect of the shaker box.   And yes, I've sat and played with just the shaker box.   How could I not?

Saturday, January 5, 2013

Seriously Hot Wheels

This card is for the Bombshell Stamps January Sketch Challenge.   I used Bombshell Stamp's Piston Rebel set to create this.

 The image is stamped with Memento Tuxedo black and colored with Copics.   I did have to darken the stamped image of the motorcycle itself with the Copic Multiliners to darkent it.


The papers from 7 Gypsies (Venice 6x6) mounted on SU cardstock


The diamond plate is adhesive sheets of metal from Quickutz embossed with a Tim Holtz/Sizzix embossinf folder and treated with a smidge of Tim Holtz alcohol inks. I had the background more grungy and distressed looking, but ended up decidingon a cleaner look and cleaned much of the ink back off just leaving a twinge of color. 

And here's the inside of the card. 


Now when I handed this card to my soon to be 11 year old son last night, he went WOW... wow mom.  WOW, this is awesome.   LOL.   I guess I have a hit in his eyes.  


And here's the sketch from the Bombshell Blog.  I ended up leaving off some of the accents as I couldn't find anything that fit perfectly.   I chose to keep the card with just the main elements of the sketch. 


Tuesday, November 6, 2012

Fall Ride

This card is for this month's sketch on the Bombshell Forum.  In making this card I was reminded of the first time I got to ride on a motorcycle in the Fall with leaves being stirred up and swirling around the roar of the bikes.   It was on some beautiful winding backroads in Ohio.   So I couldn't help but add a lot of leaves to this card - swirling all around.


Here's the sketch I used.  I took the Bombshell Forum sketch and turned it sideways to align with the length of the motorcycle.


Here's a bit of an angled shot to see the dimension.  


And lastly, the inside of the card. 


Supplies:
Stamps: Bombshell Stamps (Vintage Motorcyles, Custom Choppers (for the greeting))
Ink: Memento (to stamp the image), Stampin' Up (to add some shading and for the greeting)
Coloring: Copic markers
Paper: BoBunny (Apple Cider), Stampin' Up Cardstock)
Tools: Quickutz (swirls), EK Success (border), various leaf punches including from EK Success, Creative memories, and Marvy


Saturday, June 2, 2012

Simply an Apple

I made this simple / CAS card thinking of our teachers at the end of the school year.   I think I'll make a few more just to keep on hand to use next year.   I know our teachers go out of their way a lot and when we're fortunate to have our kids with a teacher they love, there's no value you can put to that.   A little thank you note now and then can't hurt.

 
The card is very simple and so are all of the supplies.   The card base is Crumb Cake Stampin' Up cardstock and the apple was cut with scraps of other SU cardstock.   The red loopy border is stamped using a border stamp from Close To My Heart (Boutique Borders) using Stampin' Up Poppy Parade Classic In.  The apple was cut using a Quickutz die and mounted with a SU dimensional.   Some ribbon that I picked up at the craft store ages ago finishes off the card.  


 Here's a close up of the apple. It's just a pretty little die.


Thursday, May 31, 2012

Father's Day Clock (cQc139 and Mojo243)

Since I don't often get a chance to participate in some of these great weekly challenges, I thought I'd try to take care of two challenges with one card.   Plus, I need a Father's Day card.  Hey, that's three birds with one stone.


I used the Mojo Monday #243 sketch and the color combo from the ColourQ #139 challenge.


So this is the result of combining 1) the sketch from Mojo Monday, 2) the colors from this week's ColourQ challenge, 3) the Father's Day theme, and 4) the fact that my husband likes clocks.  Voila!


Stamps: The clock stamp is from Close to My Heart (Make it Count).  The greeting and frame are by Stampin' Up (All Year Cheer, Tagtastic).
Ink: Stampin' Up (Night of Navy and Rich Razzleberry)
Papers: Stampin' Up
Tools: Stampin' Up Decorative Label Punch, Quickutz gear dies, Circle cutter
Accessories: various brads

Tuesday, April 24, 2012

Vintage Harley - MOJO238


I can't believe I finally managed to do another MOJO Monday card sketch.  With as busy as life gets for this working Mom, this seems to happen once in a blue moon.  I do want to take the time to do sketch and color challenges more frequently.  They're really fun.   Here's the card I came up with the MOJO238 sketch. 


A lot was involved in this card.  I was determined to make a masculine card and use embossed metal.   I picked up some Quickutz metal sheets that have an adhesive layer on the back.  I ran it through a Cuttlebug embossing folder and inked it up using Tim Holtz/Ranger Alcohol Inks and Versa Magic Liquid Chalk.   I rubbed some of the extra off of the raised portion using some Alcohol Blending Solution (Tim Holtz/Ranger product) and a simple white eraser.

The alternating squares (or circles rather) were made using several punches and Stampin' Up Cardstock.   I used Creative Memories star punches, a Creative Memories circle punch, and a 1 1/8" EK Success circle punch.  I added a little subtle shading to the yellow Cajun Craze (retired SU color) stars and the Always Artichoke green circles using Stampin' Up dye ink and those wonderful artist sponges that Stampin' Up also sells.


The accent image is stamped using this great vintage motorcycle stamp by Bombshell Stamps and colored with Copics.  I stamped using Tuxedo Black Mememto Ink.  The orange shading on the circle is done with Dusty Durango SU dye ink (retired color).  I added additional circles of Night of Navy cardstock and a silver circle cut out of the same metal I used for the squares.   The tags were cut using an original Sizzix die.  The brad is by Karen Foster.  The ribbon, card base, and greeting stamps are all Stampin' Up. 

Here's the cards sketch from MOJO Monday - Sketch MOJO238

Sunday, April 8, 2012

Tag: Wonderfully Wonky Birthday Cake

This is for a swap on Scrapshare.  The group is to make 7 and I chose a birthday theme.   I started with this great cake die from Quickutz and it reminded me of some of Tim Burton's movies.  I used that as inspiration for the background.   I created the frame using Make the Cut (MTC) software and cut it with my KNK Zing.  This one took me a while to get done, but I love the results.  


The printed papers are from Basic Grey's Green at Heart collection.  The cake stand is made out of this glossy pearl paper that I picked up at the art department.  The black cardstock is by American Crafts.  Every single colored piece is inked with Tim Holtz / Ranger Distress Inks.  It's very subtle inking but just enough shading to give the pieces some dimension and life.


I used a lot of bling and glitter on these.  The Quickutz die has a lot of voids in great patterns.  I took advantage of those voids and either added bling or glitter.   The glittered is applied by running a backing paper through the Xyron face up and then applying very fine craft glitter. 


Here's the entire grouping.   I love this look.  I made 7 for the swap and a few extra for cards. 


The swap called for the back to be finished too.   I used a 6x6 background stamp by Impression Obsession on the back of the scrap piece from cutting the green frame on the front of the tag.   I stamped using Stampin Up's Lucky Limeade Classic Ink and sponged the outsides with the same ink. 


I couldn't resist this shot as I finally compiled all the birthday cakes.  

Sunday, April 1, 2012

Love Tag


This is another tag for a swap hosted by JenniferD on Scrapshare.   The swap is for a single embellished large tag.   The theme for this group was to add a quote or sentiment.   I wanted to do a white on white tag and found a great stamp for it.

The stamp is a clear stamp by Fiskars.  I used Memento ink.  the papers are Very Vanilla and Close to Cocoa by Stampin up and some beige shimmer paper that I picked up in the art department at the craft store.   Dies used include Spellbinders and Quickuts for the swirls.   The accents include Ribbon by Stampin' Up, Prima flowers, Stampin' Up brads, and pearl accents.  Lastly, I used a Tim Hotz/Sizzix embossing folder for the textured back ground.


Here are a couple of close ups of the tag that show the dimension.   Behind each shape cut there is a close to cocoa layer popped up with Stampin' Up Dimensionals.   It looks like a shaddow in the picture, but if you look closely you can see the bottom layer is actually another layer of cardstock.   The ribbon is sandwiched between the embossed vanilla layer and the cocoa backing layer.


The swap group is a "make four".   Each tag turned out a bit different.   Here they all are.


And here's a close up of all four tags.  You can see the cocoa backing layer a bit better in this shot.


Thursday, March 29, 2012

Tag: Peaceful Rock

I probably should have known better, but I signed up for another swap on Scrapshare.   Well, I can't really complain.   I love the inspiration I get from these swaps to create something a bit different and that I normally might not put together.   This swap is for large tags with embellishments and layers. 

I pulled out quite a few supplies on this one.   You can see more of the detail with the close up below.  


Supplies: 
Paper: Basic Grey (Obscure)
Tools: Martha Stewart (Border Punches for both the drips at the bottom of the tag, but also the checker board strip), Fiskars corner rounder scissors, Make the Cut software to trace and create the rocker and the peace symbol with two shadow layers, KNK Zing to cut the rocker and peace symbol, Quickutz embossing folders (for the top layer of the peace symbol and the top of the tag), Fiskars corner rounder scissors
Inks: Ranger/Tim Holtz Distress Ink (stamping and I shaded every single piece on this tag)
Stamps: Stampin Up (ink splatters from French Foliage set)
Accents: Star brad - I think by Paper Studio, Star shaped bling, little orange pearl bling.
Other: Stampin Up Dimensionals to pop up the guitar player, paper tearing

Thursday, February 23, 2012

Swap Set: Purple Pretties

This is another swapset for JenniferD's swap on Scrapshare.  The swap is for scrapbook page elements.  The theme for this group is purple.  Purple isn't one of the easiest groups for me to work with, but it's my daughter's favorite color, so I searched my stash and stretched my creativity.   Here's what I came up with.   


The paper is by Basic Grey (Green at Heart collection).  The border is made with an EK Success border punch.  It's one of the newer releases that I've seen hit the stores and just couldn't resist the swirl.  I'm a sucker for swirls.   I mounted the punched layer of purple on top of a printed strip the same witth and then added a green border.   The little flowers are made using a Martha Steward punch.  Lastly, I added some bling to the center of the flowers. 

The butterfly is made with a two layer 4x4 Quickutz die set.   I ran the bottom layer through a xyron machine with the print side down to apply the adhesive to the print side.  I then added the detailed cut top layer and topped off the butterfly with some tinsel glitter.  The tinsel glitter stuck to any of the openings in the butterfly where the bottom adhesive layer showed through.  I've used this technique for applying fine art glitter occasionally throughout the years and it holds up well.   If you look back at some of the Christmas cards I made, there are some tags where I used the same technique.   Oh and I almost forgot about the body of the butterfly. That's cut with yet another piece of paper.  This time an orange print/solid from the pack.  I then colored the body using some Copic markers.  

Last but not least, the medallion is cut with a Spellbinder die.  The die is quite intricate and I ran it through my machine two or three times to make sure I had a good cut.   The flowers are Prima flowers.  The brad is a Build-A-Brad by Stampin' up and I used a 1/2 inch circle punch out from another print in that same Basic Grey set.  

Friday, December 16, 2011

Oh Deary Deer

If you've been checking in on my blog, then this paper set looks familiar to you.  I put it to use with a few card designs this year.  I really love the red cream and black color scheme.  it's just classic and very rich.   And with any luck, you might not be bored of this paper pack just yet.   


Supplies:
Stamp: Stampabilities
Ink: Gold pigment ink, Colorbox liquid chalk
Paper: Paper Studio
Tools: Spellbinders, Quickutz
Accents: Ribbon, Gold bling stickers
Misc.: Gold embossing powder.
Related Posts Plugin for WordPress, Blogger...