Showing posts with label Close to My Heart. Show all posts

Saturday, June 29, 2013

Roaring Birthday

Here's a perfect birthday card for a guy in your life.  This project is also posted on the Bombshell Blog.  Check it out.   The image is stamped using Tim Holtz Distress Ink, embossed with clear embossing powder, and then colored with Copic markers with a touch of sparkling silver added here and there using a Gelly Roll Stardust pen by Sakura.

And for any of you that might be wondering why I've been posting less lately.  It's simply that day job thing.  Work has been intense for the last few months and there's no sign of it letting up.  So when I come home, it's all I can do to run the kids to their engagements and then I'm just zapped.   I'm sure many of you can relate.


and the inside of the card


Supplies: 
Stamps: Speed Shop (Bombshell Stamps); greeting from Pennant Parade (Stampin' Up)
Ink: Distress Inks - Walnut Stain for the car and Vintage Photo for shading (Tim Holtz/Ranger); Riding 
Coloring: markers (Copic), Gelly Roll Silver Stardust pen (Sakura)
Hood Red (Stampin' Up)
Printed Paper: Lost & Found (My Mind's Eye)
Cardstock: Riding Hood Red, Not Quite Navy, Chocolate Chip (Stampin' Up)
Tools: circle punch (Creative Memories); scallop circle punch (Stampin' Up); Sequence embossing folder (Lifestyle Crafts)
Accessories: cocoa pearls (Close to My Heart), dimensional adhesive; clear embossing powder

Wednesday, April 10, 2013

Party Animal Invites


My little girl is turning 9.  It's amazing how time flies.   We made these party invites to send to her friends.   After about 25 of these, I'm done with little funky monsters for now... though I admit, they were fun to do.


Supplies: 
Stamps: CTMH (Party Animal)
Ink: Memento
Coloring: Copic
Paper: Hammermill Coverstock for the card base, DCWV textured cardstock
Tools: Spellbinders (scalloped squares)

Monday, December 24, 2012

Builder's Christmas

I made this card for our work group to give to our boss.  Our manager is in the process of building his home, thus the home and tools theme. 


And the inside of the card


Supplies: 
Stamps: Stampin' Up (Christmas Punch), CTMH (Festive Thoughts - inside of card)
Ink: Memento
Paper: Echo Park, SU cardstock (Espresso, Cranberry Crisp, Crumb Cake, Marina Mist)
Tools: Martha Stewart (border punch), Stampin' Up (large oval), Ellison (tools die)
Accessories: SU (Ribbon)

Thursday, December 6, 2012

Christmas Snow Birds

FROM THE ARCHIVES

Earlier this year, I made this Christmas card and it's certainly worth reposting.  In fact, I made several of these to send out to friends and family this year.   It's a great one for duplication. 
_______

I stumbled across SplitcoastStampers Featured Stamper challenge this week (FS290).  The challenge is to case one of the featured stamper's cards.  This week Mary (screen name jandjccc) was featured.  She has a lot of beautiful work in her gallery.  I chose to case this card CLICKY.  I did change it up a bit.   I added another mat, used a different embossing folder, used a different stamp and rounded all of the corners.


Here's a close up to show off the texture and dimension.  I just loved the white on white texture look.  it's so clean, simple, and rich at the same time.


Supplies:
Stamps: Stampin' Up (Contempo Christmas)
Paper: White Hammermill cardstock, Stampin' Up cardstock (Cherry Cobbler, Lucky Limeade)
Tools: Stampin Up (bird punch and embossing folder), Martha Stewart (sprig punch)
Accessories: Close To My Heart (charcoal colored pearl stickers), Ranger (Liquid Pearls - Ruby Red)

Sunday, October 14, 2012

Wicked Collaboration


Halloween is around the corner.   The kids and I just went to the pumpkin patch this afternoon and picked out a pumpkin to carve.   Here's a card my daughter and I made for her teacher last year.  


Supplies: 
Stamps: greeting and cat from Close to My Heart, pumpkin from Basic Grey, 
Ink: Stampin Up
Paper: K& Company, misc purple glitter.
Tools: Martha Stewart border punch, Spellbinder, Ribbon


Thursday, August 23, 2012

Friendly Monster Birthday

Here's my card using this week's Mojo Monday sketch.  I stamped and colored the little monster image some time ago using my Copic markers.   I can't color right now as my hand is still heeling from surgery, so it's a perfect time to put this little one to use.  Oh and I have to add that the colors are for my 8 year old daughter.   It's a bit busy for me, but she thinks it's wonderful.  :-)


Supplies
Stamps: Close to My Heart (Party Animal), Stampin Up (Vintage Labels)
Paper: Basic Grey (Lime Rickey), Stampin' Up card stock
Tools: Spellbinders, Stampin' Up punches, Fiskars border punch
Coloring: Copic Markers, Memento Ink, Stampin Up inks.

Sunday, June 17, 2012

Vintage Bombshell Tag

This is my last tag for a tag swap that I joined on Scrapshare.  The theme for this group is Vintage.   I couldn't resist using my Bombshell stamps.


The Bombshell gal is stamped using the Bombshell Angel from Bombshell Stamps and dressed using the coordinating cutting file.  I cut the clothing using Make the Cut software and my KNK Zing.   I used primarily Copic markers for the coloring.   The shoes have some Spica markers on them and I added touches of shimmer here and there using a gel pen.   The Vintage Harley in the background is also from Bombshell Stamps (Vintage Motorcycle) and is colored with my Copic markers.   Both images are stamped using Rich Cocoa Memento Ink. The star is stamped using Stampin Up ink and Close to My Heart stamps (Wishing Star).  It's cut out by hand and mounted on a couple of circles where I added a smidge of shading with SU inks.


The paper used for stamping the motorcycle and the gal is Neenah.  The star accent is made using Stampin' Up cardstock and Stampin' Up Dimensionals. The background print is by Graphics 45 and is slightly shaded using Stampin Up ink on the outside.  The shirt is also cut from a Graphic's 45 print and shaded using Copics.   The hot pants are cut from Stampin' Up River Rock cardstock and colored with Copics to match the Harley in the background. Lastly, a bit of adhesive red pearls, some ribbon and a mini clothes pin finish up the tag. 


 Here's a shot at an angle that shows some of the dimension. 

Saturday, June 2, 2012

Simply an Apple

I made this simple / CAS card thinking of our teachers at the end of the school year.   I think I'll make a few more just to keep on hand to use next year.   I know our teachers go out of their way a lot and when we're fortunate to have our kids with a teacher they love, there's no value you can put to that.   A little thank you note now and then can't hurt.

 
The card is very simple and so are all of the supplies.   The card base is Crumb Cake Stampin' Up cardstock and the apple was cut with scraps of other SU cardstock.   The red loopy border is stamped using a border stamp from Close To My Heart (Boutique Borders) using Stampin' Up Poppy Parade Classic In.  The apple was cut using a Quickutz die and mounted with a SU dimensional.   Some ribbon that I picked up at the craft store ages ago finishes off the card.  


 Here's a close up of the apple. It's just a pretty little die.


Thursday, May 31, 2012

Father's Day Clock (cQc139 and Mojo243)

Since I don't often get a chance to participate in some of these great weekly challenges, I thought I'd try to take care of two challenges with one card.   Plus, I need a Father's Day card.  Hey, that's three birds with one stone.


I used the Mojo Monday #243 sketch and the color combo from the ColourQ #139 challenge.


So this is the result of combining 1) the sketch from Mojo Monday, 2) the colors from this week's ColourQ challenge, 3) the Father's Day theme, and 4) the fact that my husband likes clocks.  Voila!


Stamps: The clock stamp is from Close to My Heart (Make it Count).  The greeting and frame are by Stampin' Up (All Year Cheer, Tagtastic).
Ink: Stampin' Up (Night of Navy and Rich Razzleberry)
Papers: Stampin' Up
Tools: Stampin' Up Decorative Label Punch, Quickutz gear dies, Circle cutter
Accessories: various brads

Wednesday, May 16, 2012

Teacher's Appreciation Week - Part 2

If you didn't get to see Monday's post, take a minute and look back.

Here's the gift we put together for my son's teacher.  It's a recipe card box.  The box itself is by CTMH and I altered it using paper by 7 Gypsies.   The book sitting behind the recipe box was my inspiration.  It's a binder in which I keep my recipes and I had some matching recipe cards that I wanted to use for this project.  I added some ribbon and metal accents. I believe those metal accents are by EK Success, but it's been a while since I purchased those.  I don't store my supplies in their packaging.  


Here's a picture of the box filled with cards along with the recipe cards and dividers.  I made the dividers using red Stampin' Up card stock and labels punched from the 7 Gypsies cardstock using the Stampin' Up flower petals punch.   My son picked out all of greeting cards that filled up the rest of the box.


Here's a picture where you can see the inside of the box and the recipe cards along with the dividers.   I used Gaffer tape to reinforce the hinge.   The Gaffer tape is also from 7 Gypsies.  I used Mod Podge to adhere all of the paper to the box, but I only covered the back of the papers.   The outside of the box feels like paper and doesn't have a sheen.


Here's a close up of the inside.  I tried to finish off the box nicely on the inside too so it would be enjoyable all the way around.


Wednesday, January 11, 2012

Smooshed Bottle Cap Accents

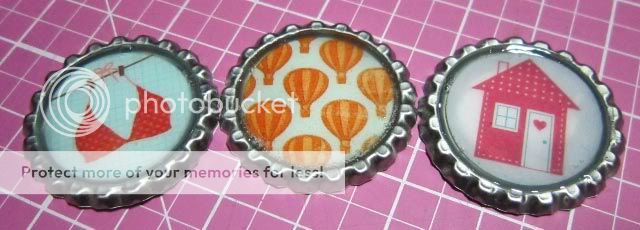
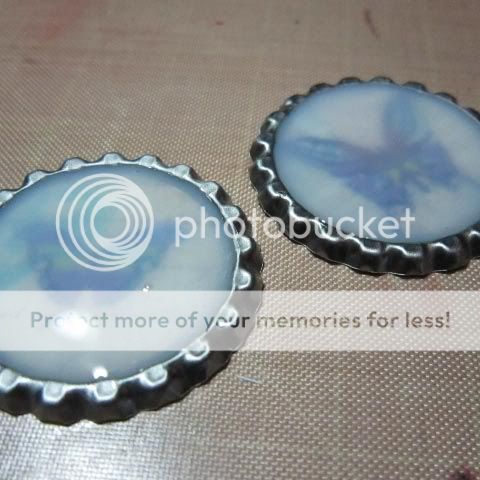
I saw this idea on the web a few months back and asked my hubby to pick up some bottle caps next time he went to the brew supply store.  He went tonight and he didn't forget about my request.  He came home with a bag full of clean bottlecaps.   Here's what the kids and I made....   They're accents that we can use to make cards, scrapbook pages, necklace charms or just about anything that strikes our fancy. 


I chose the little house (paper by Stampin' Up - 6x6 Welcome Neighbor DSP from an Occasions Mini, I think two years ago).  Spencer's is the orange hot air balloons (paper by My Mind's Eye - Lime Twist 6x6 pad).  His favorite color is orange.  Angeline... well, we have issues to work through.  She got a chuckle out of picking the bra (um bikini top) (paperr from Jillibean Soup - Watermelon Gazpacho 6x6 pad).

After making those three gems, I couldn't resist and wanted to make a couple more.   And since I was at it, I took some pictures so I could share with my online friends as to how to make these.   Mind you, these could get pricy if you buy them in the scrapbook store.  However if, you pick them up at a brew supply store or hardware store, a bag of a 100 of these is just a couple of bucks.  Now I understand that you can't just use a bottle cap off of the beer you enjoyed with dinner.   The steel on those is much too hard and they won't compress as easily as the ones from the hardware store or brew supply store. 

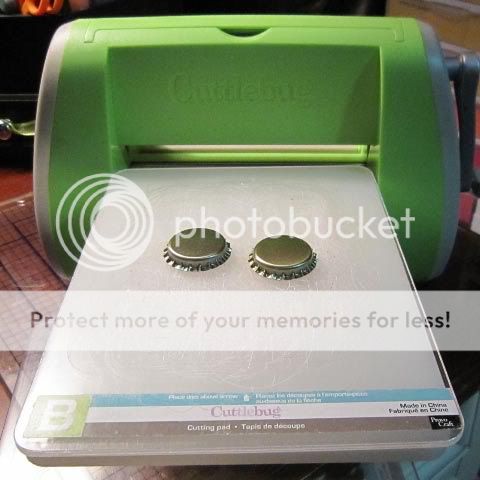
Step 1:  Use your Sizzix or Cuttlebug to smoosh the bottle caps.  


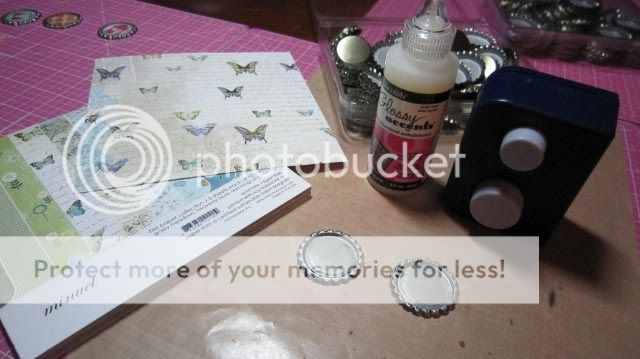
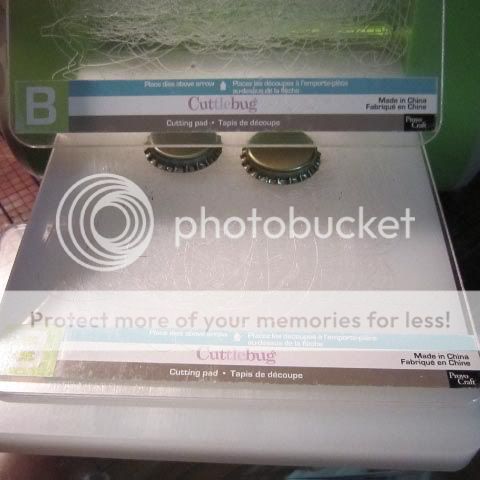
I used the big white A plate spacer and my two B plates.  That's the same set of plates that you use for a standard Sizzlet or Cuttlebug die.


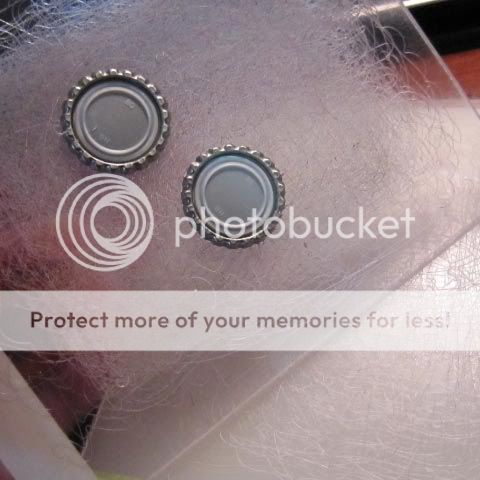
I sandwich the bottle caps in between the B plates on top of the A plae spacer.   Run the sand through the machine and you get some great flattened bottle caps.


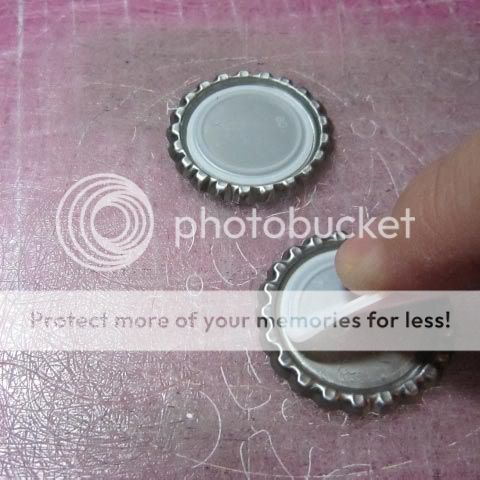
Step 2:  Peel the plastic gasket from the inside of the bottle cap.  I use my bone folder to help grab a hold of the rubber and it comes out quite easily.  Don't worry too much about cleaning any goop out of the bottle cap.  You're going to cover that with something pretty anyway.


Step 3: Select a printed paper or photograph and punch a 1 inch circle. I used my Creative Memories Shape Maker.


Sept 4: Adhere the punched out circle to the inside of of the smooshed bottle cap.


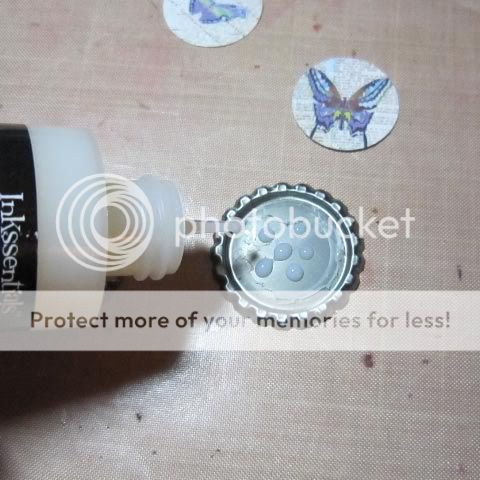
Just add a few drops of Glossy Accents by Ranger ( or Crystal Effects by SU, or Liquid Glass by CTMH, or similar product) and adhere the punched out designer scrapbook paper to the center of the cap. 


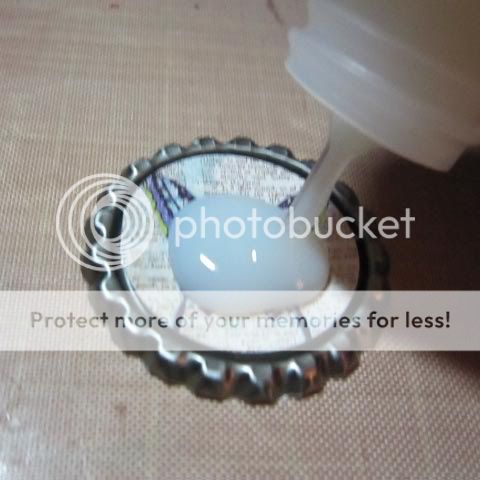
Step 5:  Apply the Glossy Accents liquid using the needle nose applicator on the product.


Using that needle nose, work the Glossy Accent into all of the crevices of the bottle cap, removing any air bubbles and pushing down the paper in the process. 


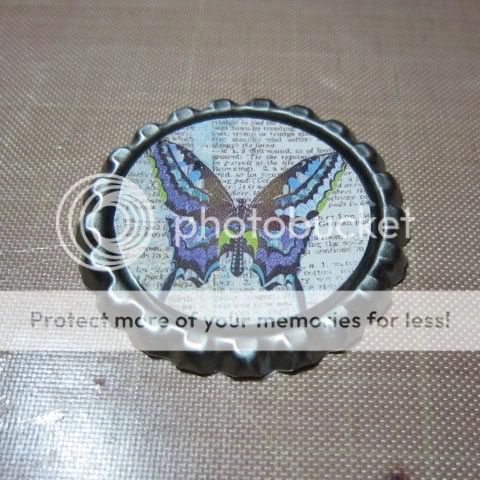
Let sit and dry.  The liquid will dry clear.   For an antiqued finish, there are some liquid accent products on the market that will dry with a slight antiqued tint. 


I hope you enjoy making your own smooshed bottle caps.  It's fun for adult and junior crafters.  Both of my kids loved making these earlier this evening.  I'm sure we'll be making more.   In fact, my son has a birthday coming up.  These'll make great accents for the thank you cards he'll be sending out to any party attendees.   :-)  

And after these butterflies dry, I'll have to make some cards and post those too.  


Supplies: 
Bottle caps from brew supply store or hardware store.
Cuttlebug, Sizzix big shot or other die cutting machine that can cut Sizzlette or Cuttlebug size dies. 
1" circle hole punch
Designer scrapbook paper or pictures.  I used a 6x6 print from Memorybox's Minuet collection.
Glossy Accents by Ranger ( or Crystal Effects by SU, or Liquid Glass by CTMH, or similar product)


Thursday, December 15, 2011

Mischief Critter Christmas

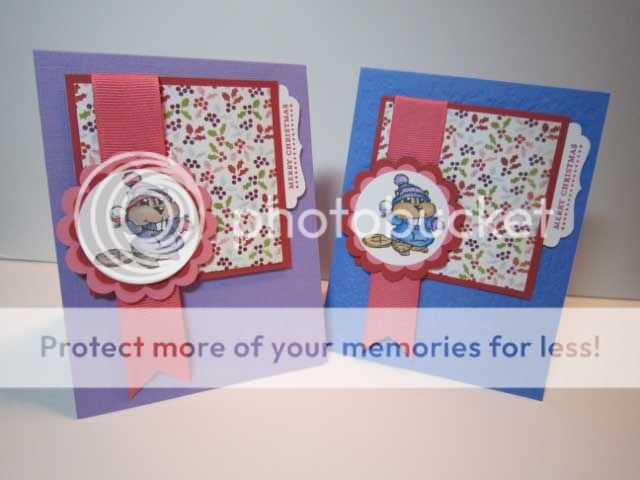
I got bamboozed by my kids to buy this Close to My Heart stamp set.  It has a gang of little critters in winter wear that was just too adorable to resist.   After both Spencer and Angeline let out coos of cuteness for these little images, they were in my shopping cart.   *sigh*   Those to kids get me every time.   I'm just a sucker for them.   

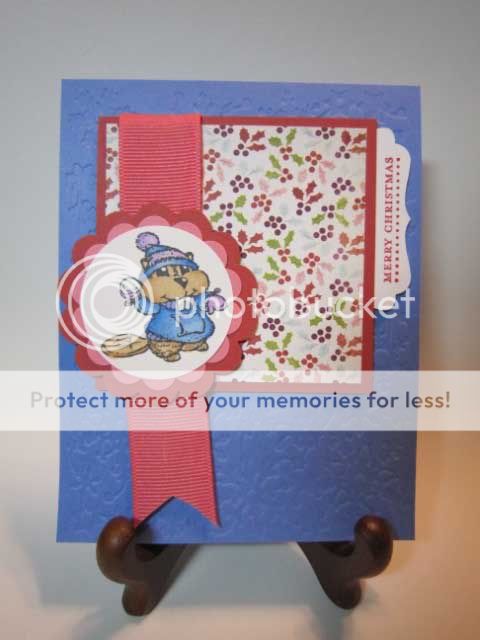
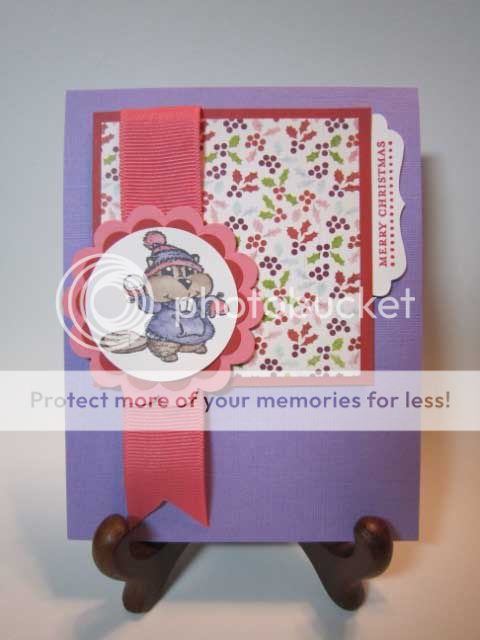
After the stamps arrived, I doodled a bit coloring two of the images and then later turned them into cards.   The one in the blue sweatshirt is colored with Copic markers and the one in the purple sweatshirt is colored using Stampin' Up markers and an aqua painter using a dry brush technique that my friend Joanie featured on her blog and uses a lot.  

The card bases are embossed using a Spellbinders embossing stencil, but it's hard to tell with the photos.  I'm going to have to practice taking better pictures to capture the details better.   


Supplies: 
Stamps: Close to My Heart (critter), Stampin' Up (Greeting)
Ink: Memento (Tuxedo Black), Stampin Up (Real Red)
Coloring: Copic markers, Stampin Up markers
Paper: Basic Grey, Stampin Up Cardstock
Tools:  Stampin Up punches (Decorative Label, Scalloped Circle, & Circle), EK Success punches (Scalloped Circle), Spellbinders embossing plates/stencils
Accessories: Misc. Ribbon

Monday, December 5, 2011

Little Christmas Angel Card

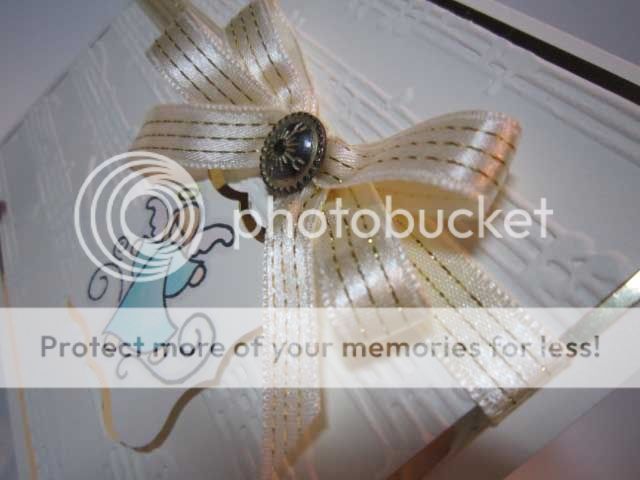
I purchased this Close to My Heart stamp set thinking of my daughter Angeline.   I couldn't help but think of her as I made this card.  It's cream and gold color scheme is simple but rich.  The little angel is colored with Copic markers.   I love the shading that I can do with those markers.  


Here's a close up and angle shot to show off the dimension.


Supplies: 
Stamps: Close to My Heart Angel Sent stamp set 
Ink/Coloring: Memento Tuxedo Black ink, Copics for coloring
Paper: Misc cardstock, Gold mirrored board from the art department
Tools: Stampin Up Curly Label punch, Sizzix embossing folder
Accessories: Misc Ribbon, Stampin Up brad

Technique: 
The ribbon isn't actually tied, but bundled and then captured by the brad.   The angel is punched with the SU Curly Label punch.  The gold shadow layer is merely another punch with the Curly Label punch and then turned 90 degrees.   Add a SU dimensional and position below the ribbon.  


Related Posts Plugin for WordPress, Blogger...