Showing posts with label Glitter. Show all posts

Monday, September 9, 2013

Delicate Garden Butterfly

Here's that Martha Stewart mold again.  I dusted the mold with some sparkly white glitter before filling it with white clay.   It gave it a nice white shimmer.  Perfect for a wedding, anniversary, or christening card. 


Supplies: 
Tools: mold and clay (Martha Stewart), embossing folders (Quikutz)
Cardstock: Hammermill, Stampin' Up
Accessories: fine white glitter; dimensional adhesive. 

Wednesday, March 27, 2013

Valentine Texture

I posted my son's valentine's day cards last.   Here's what my daughter and I came up with for her Valentine's Day cards. 


Each card is made with an embossing folder and some stamped image, except for the glittery heart card that is on the right in the image below.   We stamped and punched several hearts, ran a piece of cardstock through the Xyron, adhered the hearts and covered the rest of the exposed adhesive with fine craft glitter. 


I used various embossing folders and embossing plates.   Some are from Stampin' Up, some from Sizzix, some from Cuttlebug, and some from Hobby Lobby (Paper Studio).


I also used several different SU punches including the heart punches, label, oval, scalloped, etc.  


These cards are a non-standard size, so I had to make custom envelopes.   Here's one of the cards with an envelope. 


I ended up using three different prints for the envelopes.  Cute!


And here they all are again lined up on my desk.  


Stamps: Stampin' Up (I {Heart} Hearts, You Are Loved, and Valentine Defined)
Ink: Stampin' Up
Cardstock: Hammermill White cover stock, Stampin' Up colored cardstock.
Tools: Stampin' Up Punches (Heart, Hearts, Decorative Label, Square, Scallop Square, Postage Stamp and Large Oval), Embossing Folders and Plates (Stampin' Up, Cuttlebug, Sizzix, Paper Studio)
Accessories: Glitter

Wednesday, March 13, 2013

Twinchie - Wall Butterflies

Here's my last Twinchie/Trinchie for JenniferD's swap on Scrapshare.com.   It's almost sad that I'm done with this swap as these little works of art were so much fun to create.    One of the challenges that Jennifer gave us for all of our sets was to use three embellishments.   I took her literally on this one.   I used papers from My Mind's Eye Miss Caroline - Dolled Up 6x6 pack.  One of the prints in that pack is of butterflies all lined up.  I took inspiration from that print.  Each butterfly is dressed up a bit differently - pearls flocking, glitter, microbeads, and rhinestoes.   


I used one of Martha Stewart's butterfly punches.   For the flocking and glitter, I ran the butterflies through my Xyron both face up and face down.   For the microbeads, I punched butterflies out of sheets of Terrifically Tacky tape.  The pearls and the rhinestones were the easy part.    :-)   


Here they are piled up before packaging and mailing.   

Tuesday, December 11, 2012

Snowflake Ornament Card

I made these cards using some ornaments I picked up during close out at Hobby Lobby last year.  While they're cute, they're still a bit too thick to make into a card.  I built a shadow box window using the ornament punch from SU and mounted the little ornaments inside of it. 


Also a lesson learned for glittery paper.  It's hard to stick stuff to it.  I had to go back and re-do the card by adhering assembly with the ornament down using Score Tape.  That back layer is gorgeous, but the glitter is hard to work with. 

 Here's another version.


And a bit of an angled view so you can see the dimension and shadow box that frames the ornament.


Supplies: 
Paper: My Mind's Eye, Core'dinations Pearls (red and silver)
Accessories: Ribbon, Bling, Ornaments from Hobby Lobby
Tools: EK Success (corner punch), Stampin' Up (ornament punch)

Wednesday, October 31, 2012

Ghost Rider


Happy Halloween.   I was hoping to have this done to join the Bombshell Stamps blog hop today, but life was just too busy.   The challenge was to make a black and white Halloween card with one additional color thrown in.  As you can tell, that color is green for me.   


The motorcycle is stamped in black pigment ink and then embossed with black embossing powder.   I colored the image using Copic markers and had a time getting those green ghost flames to look decent.  


Supplies: 
Ink: Stampin' Up Craft Ink (Basic Black)
Coloring: Copic Markers
Papers: Neenah cardstock for stamping/copic coloring, K&Company (paper is glittered and embossed)
Other: Black Embossing powder

Sunday, April 8, 2012

Tag: Wonderfully Wonky Birthday Cake

This is for a swap on Scrapshare.  The group is to make 7 and I chose a birthday theme.   I started with this great cake die from Quickutz and it reminded me of some of Tim Burton's movies.  I used that as inspiration for the background.   I created the frame using Make the Cut (MTC) software and cut it with my KNK Zing.  This one took me a while to get done, but I love the results.  


The printed papers are from Basic Grey's Green at Heart collection.  The cake stand is made out of this glossy pearl paper that I picked up at the art department.  The black cardstock is by American Crafts.  Every single colored piece is inked with Tim Holtz / Ranger Distress Inks.  It's very subtle inking but just enough shading to give the pieces some dimension and life.


I used a lot of bling and glitter on these.  The Quickutz die has a lot of voids in great patterns.  I took advantage of those voids and either added bling or glitter.   The glittered is applied by running a backing paper through the Xyron face up and then applying very fine craft glitter. 


Here's the entire grouping.   I love this look.  I made 7 for the swap and a few extra for cards. 


The swap called for the back to be finished too.   I used a 6x6 background stamp by Impression Obsession on the back of the scrap piece from cutting the green frame on the front of the tag.   I stamped using Stampin Up's Lucky Limeade Classic Ink and sponged the outsides with the same ink. 


I couldn't resist this shot as I finally compiled all the birthday cakes.  

Thursday, February 23, 2012

Swap Set: Purple Pretties

This is another swapset for JenniferD's swap on Scrapshare.  The swap is for scrapbook page elements.  The theme for this group is purple.  Purple isn't one of the easiest groups for me to work with, but it's my daughter's favorite color, so I searched my stash and stretched my creativity.   Here's what I came up with.   


The paper is by Basic Grey (Green at Heart collection).  The border is made with an EK Success border punch.  It's one of the newer releases that I've seen hit the stores and just couldn't resist the swirl.  I'm a sucker for swirls.   I mounted the punched layer of purple on top of a printed strip the same witth and then added a green border.   The little flowers are made using a Martha Steward punch.  Lastly, I added some bling to the center of the flowers. 

The butterfly is made with a two layer 4x4 Quickutz die set.   I ran the bottom layer through a xyron machine with the print side down to apply the adhesive to the print side.  I then added the detailed cut top layer and topped off the butterfly with some tinsel glitter.  The tinsel glitter stuck to any of the openings in the butterfly where the bottom adhesive layer showed through.  I've used this technique for applying fine art glitter occasionally throughout the years and it holds up well.   If you look back at some of the Christmas cards I made, there are some tags where I used the same technique.   Oh and I almost forgot about the body of the butterfly. That's cut with yet another piece of paper.  This time an orange print/solid from the pack.  I then colored the body using some Copic markers.  

Last but not least, the medallion is cut with a Spellbinder die.  The die is quite intricate and I ran it through my machine two or three times to make sure I had a good cut.   The flowers are Prima flowers.  The brad is a Build-A-Brad by Stampin' up and I used a 1/2 inch circle punch out from another print in that same Basic Grey set.  

Monday, February 20, 2012

Swap Set: Lucious Retro Red


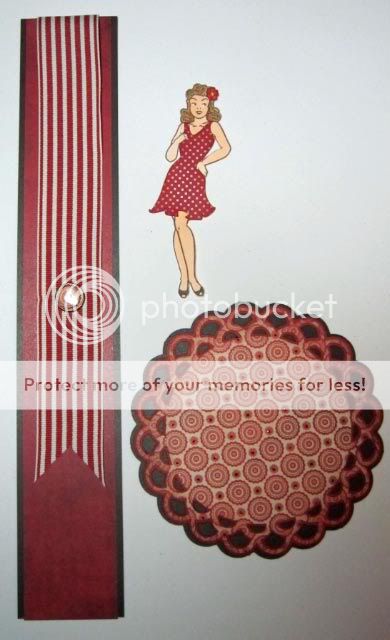
I signed up for a swap on Scrapshare.com.   One of my online friends, JenniferD, is hostessing this swap.  I love her work and just couldn't resist signing up for a few groups.   The swap is for elements to be used on a scrapbook page (or two page spread).  This group's theme is RED.   I used a card I made a few weeks back as inspiration (link).   


The gal is stamped using a stamp from the Bombshell Angel from Bombshell Stamps.  I stamped it in Memento Rich Cocoa and colored her with Copic markers.   The dress she's wearing is from a cutting file that I purchased from Bombshell Stamps and cut using Make the Cut (MTC) software and my KNK Zing.   I added some shading to the dress using Ragner/Tim Holtz Distress Inks before adhering the dress to the cut out stamped image.

The border is made using papers from My Mind's Eye (Lost & Found collection).   The ribbon is from Stampin' Up and the brad is also from Stampin' Up.  It's a Build-A-Brad that are discontinued.   The Build-A-Brad has a half inch punched image from one of the paper patterns in the MME collection under the acrylic dome. 

The medallion (for lack of a better term) was created with MTC software by joining a lot of circles very carefully, welding it to a larger circle, replicating and re-welding to each other to make sure that the image is symmetrical.  I then added a couple of shadow layers with a black out of any open spaces on the last shadow layer.   Lasly, I distressed the edges of all of the layers using Ranger/Tim Holtz Distress Ink before adhering the layers together.   The paper used is all from MME - Lost & Found collection.   The paper has small glitter accents that add just the right touch of bling.

Tuesday, December 20, 2011

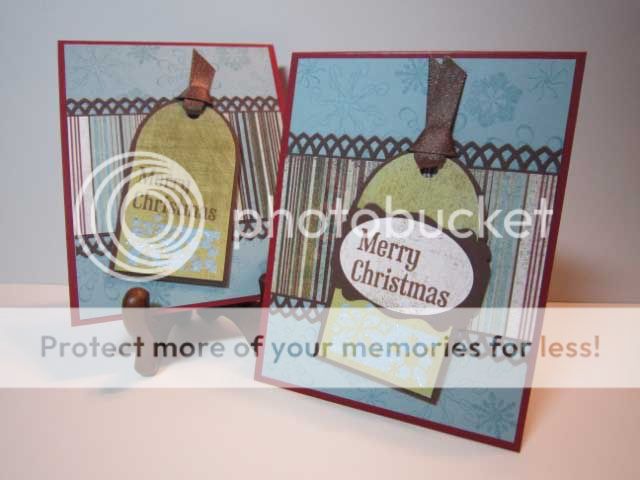
Christmas Tag Card - Take 3

Here's another variation of the tag card I posted earlier.  Hope you're not bored by these.   I did have to pick some cards that I could make fairly easily and make multiples without getting bored.   We sent out over 90 Christmas cards this year....   Making the cards in batches and repeating a design I like is the key to be able to get 90+ hand made cards done.  Last year I made multiples of the same card and waited until late in the year to make the cards.   Lesson learned.   This year's card making endeavors were a lot more fun since I worked on a larger variety of cards.  Plus, I worked on some of these earlier during the year.   

So the design does vary some from the previous versions.  I used different papers, a different border punch, and different stamps on the background paper.   I grabbed snow flakes from two different Basic Grey acrylic stamp sets.   The greeting is from a Hero Arts background stamp that I cut apart and am using the greetings individually.   

I almost forgot to mention the most interesting technique on this card.   It's that little bit of shimmer behind the cut out on the tag.   I cut the tag with my Wishblade using a free ttf dingbat font.  I then ran a scrap of cardstock through the Xyron and adhered it, with the adhesive side up onto the card.   Coat the exposed adhesive with glitter and voila.


Supplies: 


Ink: Stampin' Up, Colorbox Liquid Chalk

Paper: Basic Grey, Misc cardstock

Tools: WishBlade, Hole punch, Martha Stewart Border Punch, EK Success (label punch), Stampin' Up (large circle)

Accessories: Glitter, Ribbon
Misc.: Xyron

Sunday, December 18, 2011

Basic Grey Holiday Tag Card - Take 2

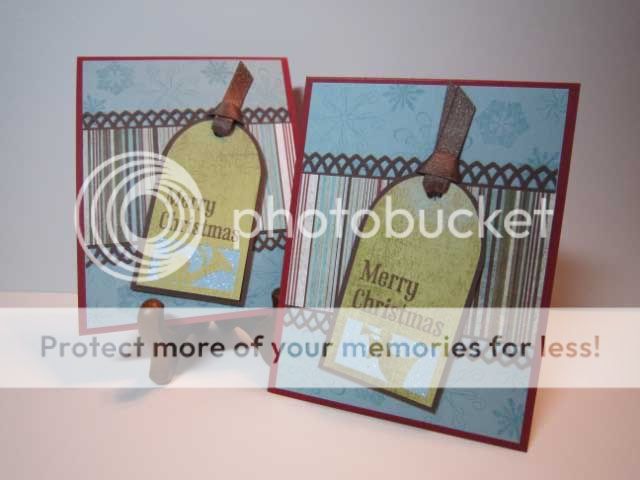
More Tag Cards.  I really enjoyed the tag cuts and it made for a simple and flexible card design that still had a lot of oomph.  The tags were cut from Basic Grey paper with my WishBlade.   I took a scrap of paper and ran it through the Xyron and placed it behind the cut out area, then applied glitter.   I used Basic Grey stamps on the brown background and some Basic Grey printed paper for the band in the middle.   

The greeting is cut from a Hero Arts background stamp that is a medley of greetings. I cut all of those greetings apart and am using them individually.  


Supplies: 
Stamps: Hero Arts (Background stamp cut into individual greetings), Baskic Grey acrylic stamps
Ink: Colorbox Liquid Chalk
Paper: Basic Grey, Misc cardstock
Tools: WishBlade, Hole punch, EK Success Border Punch
Accessories: Glitter, Ribbon

Thursday, December 8, 2011

Happy Holly Tag Christmas Card


Supplies:
Stamps: Acrylic stamps, I believe they're Inkadinkadoo - for the greeting and the holly tone on tone green background
Paper: Basic Grey, Misc cardstock
Toos: Wishblade cutter, Martha Stewart border punch
Accessories: Misc Ribbon, glitter, 
Misc: Dimensionals, Xyron adhesive

Technique:  
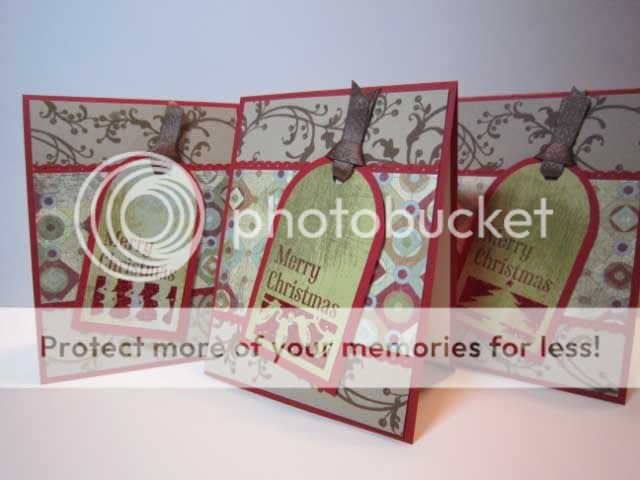
Ages ago, I cut these tags using my blue Wishblade.  The image came from a free ttf font.   I love how intricate the tags came out.   To add glitter, I ran a small piece of cardstock through the Xyron and adhered it to the back of the cut out in the tag.  I then adhered glitter to the exposed Xyron adhesive.  It holds up great.   The red shadow layer is hand cut.  

Saturday, December 3, 2011

Inspired By Surroundings - T-Mobile Ad

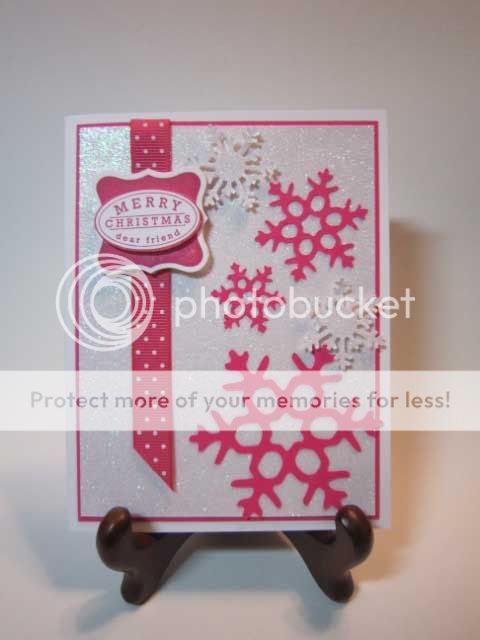
Sometimes when I lack inspiration, I try and take a closer look at the things around me.   Well, for this card, think of the T-Mobile adds.  They use a lot of white and HOT pink.   

The pink snowflakes were cut with my new electronic cutter, the KNK Zing.   I put in my pre-order back in July and the machine finally was released in November.  I got one off of the very first shipment and I just love this cutter.   It uses Make the Cut (MTC) software.  The software package is amazing and can be used with other cutters, but the Zing comes with a copy of MTC.   


Supplies: 
Paper:  White glitter paper, misc cardstock
Ink: Stampin Up Mellon Mambo
Stamps: Stampin Up Cute and Curly
Ribbon: Stampin Up
Tools: KNK Zing, Make the Cut software, Martha Stewart shape punch, Stampin Up Curly Label shape punch


Tuesday, November 29, 2011

Christmas Card Mania

Since the holidays are upon us and I've been making holiday cards like a maniac, I can't think of a better way to launch this blog than to share a card (or other creation) each day until I run out.   With any luck that will take me well into December.   

I'm new to this blogging thing though and need to work out a few bugs.   To that end, I'll share some cards that I made in prior years.  I'll start sharing new projects December 1st.  


These are some cards I made two years ago.  

Supplies:
  • Paper: White Glitter, Creative Memories Cranberry red cardstock, Creative Memories printed vellum from page completion kit, white cardstock
  • Tools: EK Success Punch, Sizzix Dies, Cuttlebug Embossing Folder
  • Embellishment: Gold thread, glitter
  • Misc: Gold gel pen (to color the tips of the ornaments), pop dots, Xyron

Technique: 
There's one technique worth mentioning here.   The NOEL placard on the front most card is made by applying Xyron adhesive to a piece of white cardstock.  I then applied the red NOEL.  Lastly I applied the glitter.  I had made this as a little test item months prior to making the cards to see how well it help up.   The glitter stayed put several months later and that little placard was the inspiration for the glitter ornaments used on that card and the others.
Related Posts Plugin for WordPress, Blogger...