Showing posts with label Cuttlebug. Show all posts

Thursday, January 10, 2013

Hot Air Birthday Balloons

This card was inspired by this week's Mojo Monday challlenge (mojo275).  Yes, I know it's Thursday night, but that's how it goes for this working mom.


The balloons were stamped in two steps.   The basket and balloon were stamped separately and then I glued the cut out basket to the back of the balloon.  Remember to leave a bit of extra paper at the top of the basket for this. 


I used masking to overlap the balloons and to add the baskets on the inside of the card.    The embossed dots on the left are created by rolling the cardstock with embossing folder into the machine a smidge and then backing it back out. 


Here's this week's MojoMonday sketch


Supplies: 
Stamps: Stampin' Up (Up, Up & Away)
Ink: Stampin' Up (Melon Mambo, Daffodil Delight, Pool Party, Soft Suede), Memento (Tuxedo Black)
Cardstock: Stmapin' Up (Melon Mambo, Daffodil Delight, Pool Party)
Printed Paper: Stampin' Up (Welcome Neighbor)
Tools: Embossing Folder (Cuttlebug - Seeing Spots)
Accessories: Stampin' Up (Steam Binding - Pool Party)


Sunday, December 9, 2012

Daydream Christmas Medallion


I fell in love with Stampin' Up's Daydream Medallion stamp set and coordinating Floral Frames Framelits Dies as soon as the catalog came out last Summer.   I just knew these would be perfect for Christmas cards too.    For this medallion, I layered four of the stamps from the stamp set and another little circle stamp from a retired set called Little Pieces for the center.   

For the back layer, I cut a second medallion, sectioned it off like pieces of a pie using my Fiskars paper trimmer and then did the shadow layer application.   Add some pearls, ribbon, embossing, matting, and that's about it.   I just love the rich effect that medallion gives.   I'll have to make more of these to send out to family and friends this season. 

Below is an angled shot that shows more dimension.   The green layer is actually stamped and cut individually and then applied.   Same with the center circle.


And here's the inside of the card.  I just this gorgeous EK Success border punch that just seemed to have similar rich and elegant qualities as the medallion on the cover.


Supplies:
Stamps: Stampin' Up (Daydream Medallion, Little Pieces)
Ink: Stampin' Up
Paper: Stampin' Up card stock
Tools: Stampin' Up (Floral Frames Framelits), EK Success border punch, 1/2 inch circle punch, Cuttlebbug Embossing Folder
Accessories: Pearls, Ribbon


Friday, December 7, 2012

Christmas Ornaments Card


My local Stampin' Up Demo, Chris Galbraith does a fantastic job.   One of the fun things she does is she puts just a little something as a thank you in my bag with my order when I pick it up.   Last month (or was it the month before) it was a sheet of Designer Series Paper from the Festival of Prints paper stack that's 6 1/2 x 4 1/2.   I had that sheet of paper sitting on my desk for a while and decided to get inspired by it to make a card.   Here's what I came up with.  I actually made three cards using that little sheet of printed paper.   Now I want to make more.   I did have that paper pad in my order that month, so I really aught to get busy. 


The colors in the print are Crumb Cake and Very Vanilla.  So I pulled those out and a red to coordinate.   I used Raspberry Ripple.   The crumb cake base is stamped with the Stampin' Up Linen background stamp (Crumb Cake ink).  The Very Vanilla layer is embossed using a Cuttlebug Embossing folder.  Add a little ribbon to the top of the die cut ornaments and then a pearl in the center medallion of the round ornament.   


The inside is kept simple.   Just a strip of DSP and I used an EK Success border punch for the small scalloped trim.


Supplies: 
Stamps: Stampin' Up (Ornament Keepsakes, Linen background)
Ink: Stampin' Up (Raspberry Ripple, Crumb Cake)
Paper: Stampin' Up (Festival of Prints DSP, cardstock)
Tools: EK Success (border punch), Stampin' Up (ornament die cuts), Cuttlebug (embossing folder)
Accessories: Stampin' Up (Ribbon), pearl

Monday, October 15, 2012

Cheerful Monday - Birthday III

Here's my third Cheerful Monday card.   See the last two Mondays for the first two cards in this little four card collection.   .


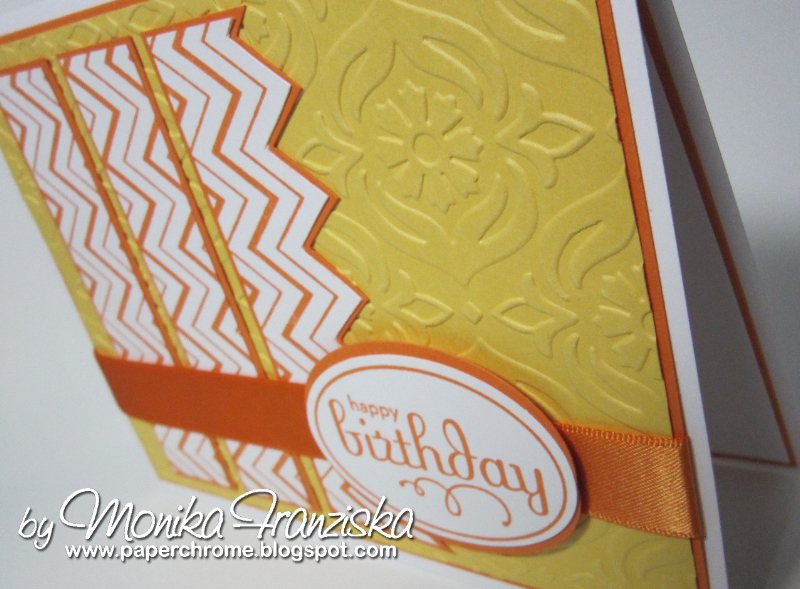
An angled shot that shows off the dimension.  I adore embossing folders.  I'm hooked.   I think I have enough, but noooo then a new one comes out that I just have to have.   I'm beyond help.


And the inside of the card with a touch of embossing on one side.  I ran the cardstock into the machine for just an inch or so and backed it back out.  


Supply List
Stamps:  Hero Arts (Zig Zag background), Stampin' Up (Happiness Always, Perfect Punches)
Cardstock: Stampin' Up (Daffodil Delight, Pumpkin Pie, Whisper White), Hammermill Coverstock for the card base)
Ink: SU (Daffodil Delight, Pumpkin Pie, Gumball Green, Certainly Celery)
Tools: SU large oval punch, Cuttlebug embossing folder


Thursday, October 4, 2012

Witches Trick or Treat

It's October and Hallween is just around the bend.  So it's time to post some Halloween cards.


Supplies
Stamps: Stampabilities (the witches legs), Stampin' Up (Holiday Best), Spider and web inside of card - misc acrylic stamps, perhaps Inkadinkadoo
Ink/Coloring: Stapin' Up Classic Ink, Copic markers, Spica Markers
Papers: Baseic Grey, K & Co.
Tools: EK Success (border punch), Cuttlebug (embossing folder), Stampin' Up (oval and scalloped oval punches, Martha Stewart (bird punch, inside of card)
Accessories: Ribbon (unknown brand)


Saturday, August 18, 2012

Newly Wed Elegance

I don't have any cards in my stash for newly weds, well...now I have one.   I used last week's Retro Sketch #24 and last week's Dynamic Duos #15 as inspiration. I wasn't paying attention to the challenge cut off dates and missed the submission deadline, however, I enjoyed the inspiration nonetheless.   I don't get to do these challenges that often, so this is a treat.   Here's what I came up with.

The embossed layer is slightly smaller than the card base and popped up.   I used a Cuttlebug embossing folder.  I cut the pink medallion using my KNK Zing after tracing the image using Make the Cut.  I wasn't sure I'd like the medallion and may end up investing in the die after all.   The upper left corner is rounded using a Martha Stewart punch.  It has a bit of a larger radius than some of my other corner rounders.


The seam binding ribbon and antique brad are from Stampin Up.  The greeting is stamped in Certainly Celery Classic Die ink and using a stamp from Stampin' Up's Teeny Tiny Wishes set and then punched using SU's Word Window punch and layered on a punch out (SU Modern Label punch).   Add some pearl accents and SU dimensionals and the front of the card is complete.


Here's the inside of the card. 


And lastly, icons from the two challenges I used as inspiration. DD15 and RS24


Sunday, May 27, 2012

Love & Sympathy

I first made this card at local my Stampin' Up demo's monthly card class.  Here is Chris Galbraith's blog post that features the cared: CLICKY.  I loved that card and it was perfect for that sad occasion when we sent our sentiments to a friend suffering a loss.  My hubby even liked the card.   That motivated me to invest in the stamp set - Love and Sympathy and recreate the card.


My version has some modifications.  I played a bit with the embossed background and used a couple of different Cuttlebug embossing folders.  I also didn't have the green ribbon, so I changed up the colors a bit and added Wisteria Wonder ribbon, cardstock and ink for the flower.


Sunday, May 13, 2012

Happy Mother's Day

Happy Mother's Day to all moms near and far including my mom and my mother-in-law.


The printed paper is by Stampin' Up.  I used a Cuttlebug embossing folder to emboss the banner.   The border punch is by EK Success.  the shape punches are all Stampin' Up.   And the greeting was created on my computer and printed. I used Stampin' Up Dimensionals to raise all of the punched elements.


Tuesday, April 24, 2012

Vintage Harley - MOJO238


I can't believe I finally managed to do another MOJO Monday card sketch.  With as busy as life gets for this working Mom, this seems to happen once in a blue moon.  I do want to take the time to do sketch and color challenges more frequently.  They're really fun.   Here's the card I came up with the MOJO238 sketch. 


A lot was involved in this card.  I was determined to make a masculine card and use embossed metal.   I picked up some Quickutz metal sheets that have an adhesive layer on the back.  I ran it through a Cuttlebug embossing folder and inked it up using Tim Holtz/Ranger Alcohol Inks and Versa Magic Liquid Chalk.   I rubbed some of the extra off of the raised portion using some Alcohol Blending Solution (Tim Holtz/Ranger product) and a simple white eraser.

The alternating squares (or circles rather) were made using several punches and Stampin' Up Cardstock.   I used Creative Memories star punches, a Creative Memories circle punch, and a 1 1/8" EK Success circle punch.  I added a little subtle shading to the yellow Cajun Craze (retired SU color) stars and the Always Artichoke green circles using Stampin' Up dye ink and those wonderful artist sponges that Stampin' Up also sells.


The accent image is stamped using this great vintage motorcycle stamp by Bombshell Stamps and colored with Copics.  I stamped using Tuxedo Black Mememto Ink.  The orange shading on the circle is done with Dusty Durango SU dye ink (retired color).  I added additional circles of Night of Navy cardstock and a silver circle cut out of the same metal I used for the squares.   The tags were cut using an original Sizzix die.  The brad is by Karen Foster.  The ribbon, card base, and greeting stamps are all Stampin' Up. 

Here's the cards sketch from MOJO Monday - Sketch MOJO238

Thursday, April 19, 2012

Triple Layer Flower Cards

It's been incredibly busy for me and my blog feels neglected.   Here are some cards from my archives that I made last Fall.  I just had to had that flower stamp when Stampin Up came out with it.  I love how you can use the punches to quickly create a three layered look (or more).

Other than a couple of ribbon scraps and a couple of Cuttlebug Embossing folders, all supplies and tools are Stampin' Up


Here are some close ups.  I stamped the inside of the cards too. 

Sunday, March 11, 2012

Thank You Mouse

My kids just love House Mouse stamps.   And I confess.  I kinda like them too.  They're just too darned cute.

I did use a little trick on this card.  I didn't have ribbon to match, so I grabbed some white grosgrain ribbon and dyed it with the ink pad.  


Supplies: 
Stamps: Stampabilities House Mouse, Stampin' Up (Oval All)
Ink: Stampin' Up
Coloring Media: Stampin' Up Watercolor Wonder.  
Paper: Stampin' Up (Blushing Bride), Misc White
Tools: Cuttlebug Embossing Folder, Stampin' Up punches, Spellbinder dies,
Accents: Ribbon (died with SU ink), Prima flowers, handmade dew drops (plastic accent beads from the floral department died with alchohol inks)

Tuesday, February 21, 2012

Swap Set : Juicy Summery Orange

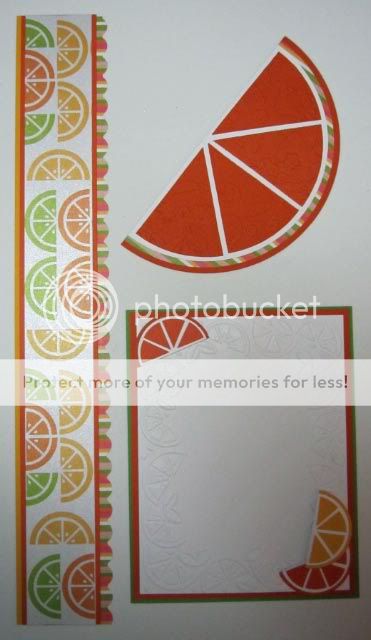
These scrapbook page elements are for a swap hosted by my online scrapping buddy JenniferD on Scrapshare.com.   I love swapping with Jennifer and probably signed up for more groups that I should have.  But then again, can you ever have to much of a good thing?   The theme of this swap group is orange.  My son's favorite color is orange, so of course I had to join the Orange group.  If it weren't for orange being my son's favorite color, I'm not sure I would have joined this group.   See what kids make you do.  


The paper is by KI Memories.   It's an older pack, but a classic none the less.  If you follow my blog, you'll see that I really don't care if the paper is new or what someone might call vintage.  I just love it all and enjoy using what I have. 

The border is pretty straight forward.   It's strips of paper adhered together.  The main patterned paper has a gorgeous shimmer to it.   The cardstock is probably smooth Bazzil.  I mix some of my stash.   The striped paper is again from KI Memories, and I scalloped it using a Fiskars border punch. 

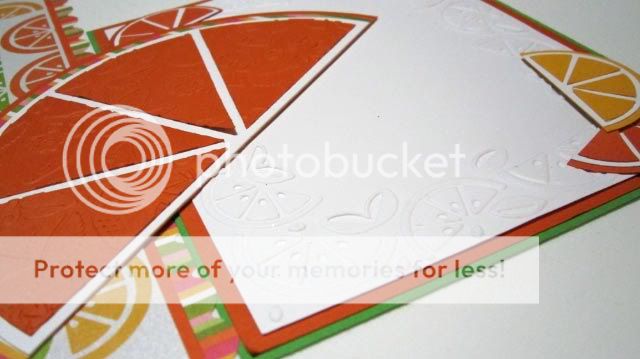
The journaling box (or photo border if you choose) is merely layered cardstock and the top white layer is dry embossed using a Cuttlebug folrder.   The orange and lemon slices are paper pieced.  I used circle punches from Creative Memories and EK Success. 

Lastly, the large orange wedge uses solid cardstock and a layer of patterned paper.  I used the Creative Memories Cutting system to cut the pieces.   The orange layer was cut one half inch smaller than the white layer.  That gave me enough room to space out the orange wedges one cut.  The wedges were dry embossed using a different Cuttlebug folder. 

The set is simple and clean, but should be nice and versatile for a summer themed scrapbook page or double page spread.

Wednesday, January 11, 2012

Smooshed Bottle Cap Accents

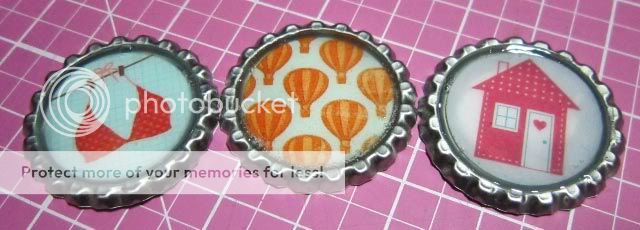
I saw this idea on the web a few months back and asked my hubby to pick up some bottle caps next time he went to the brew supply store.  He went tonight and he didn't forget about my request.  He came home with a bag full of clean bottlecaps.   Here's what the kids and I made....   They're accents that we can use to make cards, scrapbook pages, necklace charms or just about anything that strikes our fancy. 


I chose the little house (paper by Stampin' Up - 6x6 Welcome Neighbor DSP from an Occasions Mini, I think two years ago).  Spencer's is the orange hot air balloons (paper by My Mind's Eye - Lime Twist 6x6 pad).  His favorite color is orange.  Angeline... well, we have issues to work through.  She got a chuckle out of picking the bra (um bikini top) (paperr from Jillibean Soup - Watermelon Gazpacho 6x6 pad).

After making those three gems, I couldn't resist and wanted to make a couple more.   And since I was at it, I took some pictures so I could share with my online friends as to how to make these.   Mind you, these could get pricy if you buy them in the scrapbook store.  However if, you pick them up at a brew supply store or hardware store, a bag of a 100 of these is just a couple of bucks.  Now I understand that you can't just use a bottle cap off of the beer you enjoyed with dinner.   The steel on those is much too hard and they won't compress as easily as the ones from the hardware store or brew supply store. 

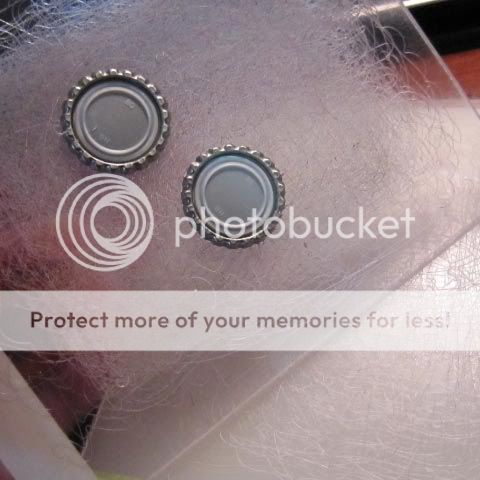
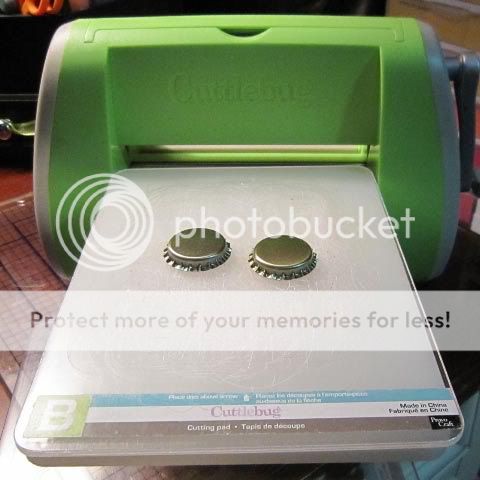
Step 1:  Use your Sizzix or Cuttlebug to smoosh the bottle caps.  


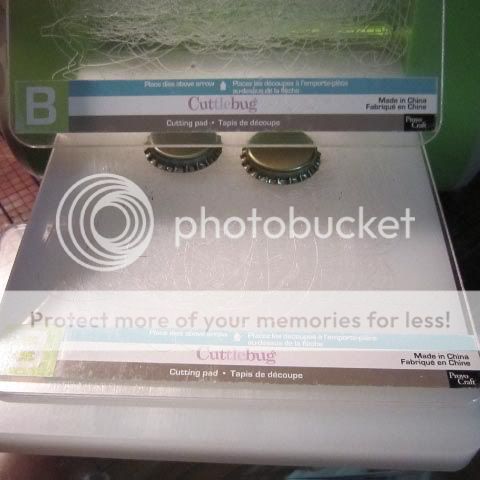
I used the big white A plate spacer and my two B plates.  That's the same set of plates that you use for a standard Sizzlet or Cuttlebug die.


I sandwich the bottle caps in between the B plates on top of the A plae spacer.   Run the sand through the machine and you get some great flattened bottle caps.


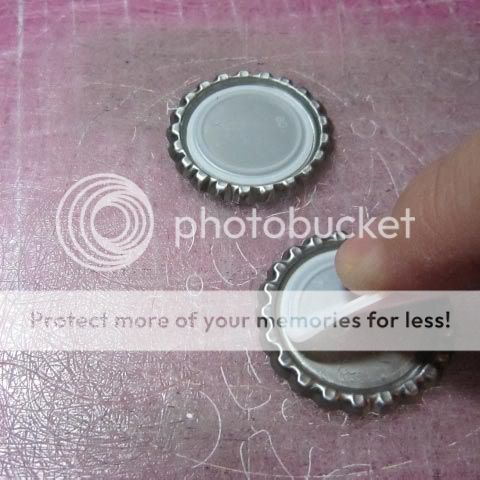
Step 2:  Peel the plastic gasket from the inside of the bottle cap.  I use my bone folder to help grab a hold of the rubber and it comes out quite easily.  Don't worry too much about cleaning any goop out of the bottle cap.  You're going to cover that with something pretty anyway.


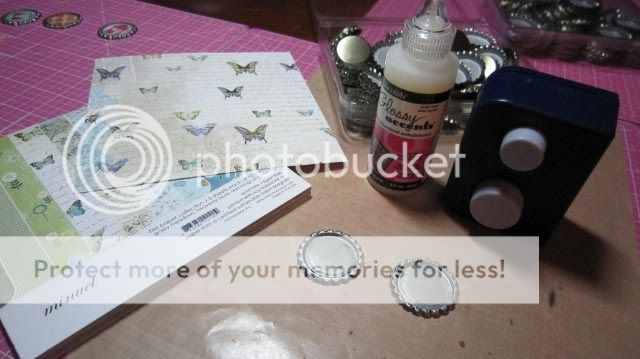
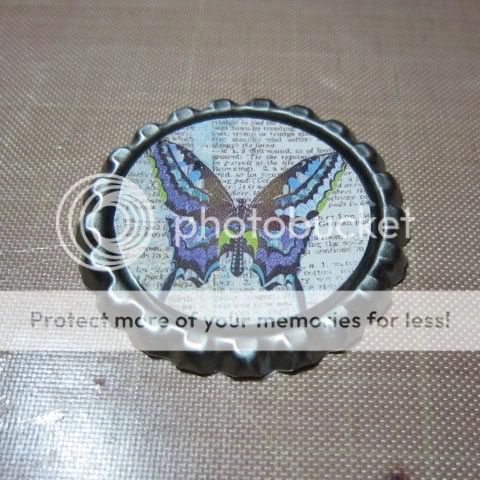
Step 3: Select a printed paper or photograph and punch a 1 inch circle. I used my Creative Memories Shape Maker.


Sept 4: Adhere the punched out circle to the inside of of the smooshed bottle cap.


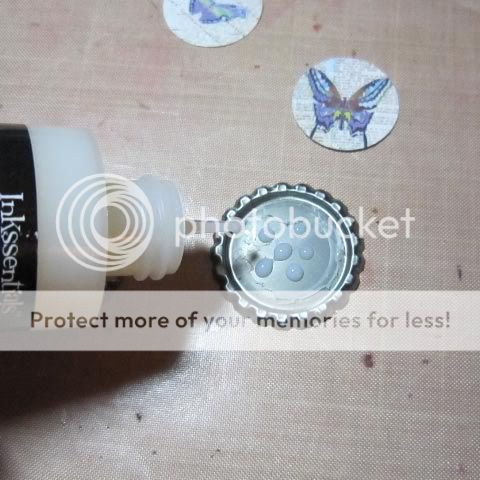
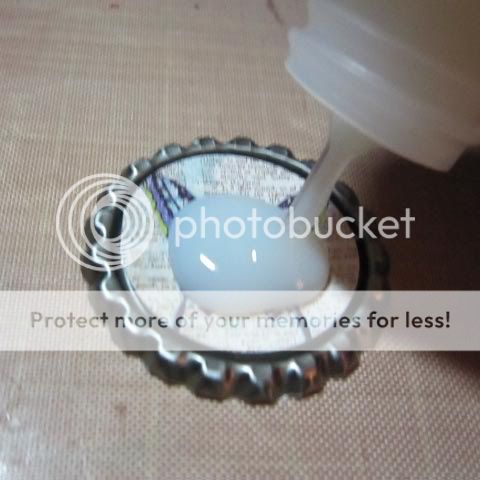
Just add a few drops of Glossy Accents by Ranger ( or Crystal Effects by SU, or Liquid Glass by CTMH, or similar product) and adhere the punched out designer scrapbook paper to the center of the cap. 


Step 5:  Apply the Glossy Accents liquid using the needle nose applicator on the product.


Using that needle nose, work the Glossy Accent into all of the crevices of the bottle cap, removing any air bubbles and pushing down the paper in the process. 


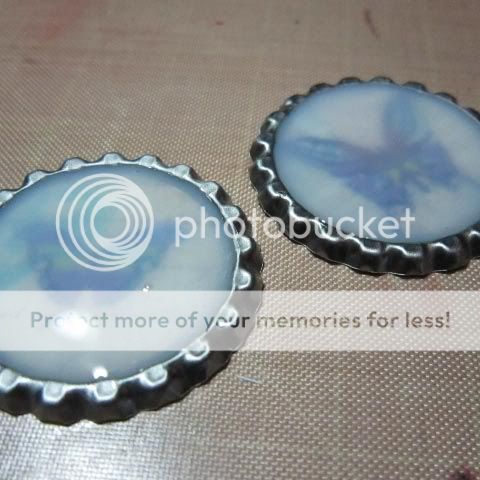
Let sit and dry.  The liquid will dry clear.   For an antiqued finish, there are some liquid accent products on the market that will dry with a slight antiqued tint. 


I hope you enjoy making your own smooshed bottle caps.  It's fun for adult and junior crafters.  Both of my kids loved making these earlier this evening.  I'm sure we'll be making more.   In fact, my son has a birthday coming up.  These'll make great accents for the thank you cards he'll be sending out to any party attendees.   :-)  

And after these butterflies dry, I'll have to make some cards and post those too.  


Supplies: 
Bottle caps from brew supply store or hardware store.
Cuttlebug, Sizzix big shot or other die cutting machine that can cut Sizzlette or Cuttlebug size dies. 
1" circle hole punch
Designer scrapbook paper or pictures.  I used a 6x6 print from Memorybox's Minuet collection.
Glossy Accents by Ranger ( or Crystal Effects by SU, or Liquid Glass by CTMH, or similar product)


Saturday, December 24, 2011

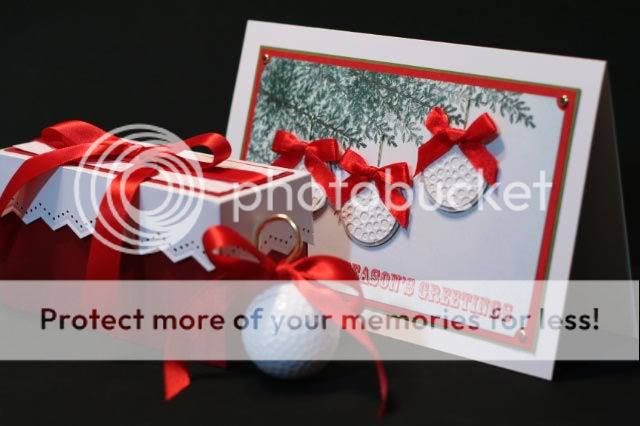
Golfer's Christmas Gift

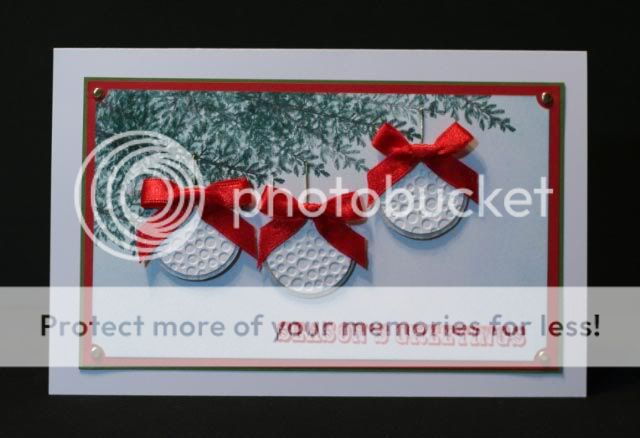
I changed job's this year and my new boss is a golfer.  The idea of these ornaments stared out as a joke idea, but then.... what the heck.  He can think of us year over year as he puts golf balls into a tree.   After all, I understand that golfers often put golf balls into trees.  Right? 

P.S. He also got a gift card to a golfer's pro shop.   


Supplies For Card:  
Stamps:  Stampin' Up (Lovely as a Tree), Hero Arts (Greeting - backgroudn stamp cut apart)
Ink: Stampin' Up
Cardstock:  Hammermill Coverstock, Misc Red and Green cardstock from Hobby Lobby, Creative Memories Silver Shimmer paper
Toos: Cuttlebug embossing folder, EK Success circle punch, Creative Memories circle punch, Stampin' Up tag corner punch
Accessories: Paper Studio gold brads, Misc. red ribbon

Supplies for Box: 
Cardstock: Bazzil (red), Hammermill (white coverstock)
Tools: Paper trimmer, Score Pal, Martha Stewart border punch, Cuttlebug embossing folder
Accessories: Ribbon

Golf Ornament: 
Golf ball, gold hooks with screw in, ribbon


Wednesday, November 30, 2011

Santa's White Christmas Card

This was last year's Christmas card.   Since I made dozens of these, it had to be a design that I really liked.  Thanks to my local Stampin Up Demonstrator, Chris Galbraith, I found the layout I wanted to use.  Hopefully she doesn't mind me posting her name and linking her blog.  She's a great gal.   I did turn that layout into a white and silver color scheme with this Santa stamp I picked up ages ago and he really needed to be put to some use. 


I started running out of ribbon and brads.  After digging through my stash and a trip to Hobby Lobby, I found a few alternatives.   Here's a sampling.  They still turned out quite similar. 


Supplies: 
Paper: White cardstock, silver shimmer paper I picked up at Xpedex.
Stamp: Unknown - I unmounted it and regretfully didn't track the mfg.
Ink & Coloring: Stampin Up Black Classic Ink and Stampin Up Watercolor Wonder Crayons, Sakura Gelly Roll Clear Star sparkly gel pen
Tools: Cuttlebug embossing folder, aqua painter
Accessories: Misc ribbon, various brads

Technique: 
I colored the stamped image using Stampin Up's Watercolor Crayons and an aqua painter.   After the imaged dried, I added a bit of sparkle to the berries and bell on Santa's hat. 


Related Posts Plugin for WordPress, Blogger...