Showing posts with label Heat Embossing. Show all posts

Sunday, December 1, 2013

Merry Scenic Winter Wishes


This card is for this week's Color Throwdown (CTD270) and Paper Players (PP174) challenges.  I actually stamped and colored the main image some time ago.   Since I'm recovering from carpal tunnel surgery, it prompted me to dig through my stash of predone elements and work with those.  This image was a perfect fit for both challenges.   


Here are a couple of angled shots.


and the inside of the card.


Supplies:
Stamps: winter scene (Hero Arts); background (Impression Obsession)
Ink: Tuxedo Black (Memento); embossing ink (Versamark)
Coloring: markers (Copic); Gumball Green Marker (Stampin' Up)
Cardstock: Crumb Cake,  Gumball Green (Stampin' Up); silver (Core'dinations); silver (Canson); white (Neenah)
Ribbon: Gumball Green stitched, silver (Stampin' Up)
Tools: oval and scallopped oval punches (Stampin' Up)
Other: silver embossing powder


Tuesday, March 12, 2013

Twinchie - Love Tim Holtz

 How can you not love Tim Holtz?  He's so fun, friendly and incredibly talented.   I watched a number of his videos from this past CHA and found myself simply enjoying them.  Watching him create was a pleasure.  He really has a great personality to go along with his creative self.  

When I joined JenniferD's twinchie swap on Scrapshare.com, I just had to sign up for the Tim Hotz group.  Here's what I came up with. 


The background paper is from Tim Holtz.  It's then stamped with his sunburst stamp twice (once in each direction).   I further added some more stamping with the script.  I made sure to heat set the ink as I used Ranger Distress Ink for the stamping and sponge shading on the edges.   After the ink was set, I used some gold pigment ink and gold embossing powder along with yet another Tim stamp to create the gold wings. 

The heart itself is cut from Grungeboard using a Sizzix original die.  I painted it with white Ranger acrylic paint using those great little dauber bottles.  After it dried, I inked up the heart with some Distress Ink, sunk it in fine embossing powder and heat embossed.  While still hot, I dipped the heart into UTEE and hit it with the heat gun again.  I added about three layers of UTEE all together.   Once dry, I bent the heart a bit here and there to crack it for some additional distress effect. 


Here they are all lined up as they were ready to be packaged up and shipped to JenniferD.  The background cardstock is from Stampin' Up.

Monday, March 11, 2013

Twinchie - Vintage Christmas

OMG, I found the Blogger button again.   I really needed a break from blogging and am glad to be back at it.  I missed it.   I'll be posting a few of the things I've made over the past month.  Somehow I manage to still create some items, but just haven't made it to the blogosphere.  Now I could tell you about work picking, soccer season back in full swing, or about the surgery on my hand.   Eh...  I just took a break.  No excuses. Now it's time to get back to posting.

Have you ever heard of an inchie or a twinchie?  It's a small canvas on which to create something yummy.   Well, my friend JenniferD on Scrapshare.com is hosting a swap for Twinchies.  I think she should actually call it Tirnchies since we're doing 3x3 squares.  Here's the first of my items for this swap.


I just love this Santa image by Rubber Stampede.  I walked past it several times at Hobby Lobby until I finally just snagged it and put it into my cart.   This is my first project using this stamp and all I can say is OH WOW!  It stamped wonderfully.    I used Ranger/Tim Holtz distress ink to stamp it and then embossed it with very fine clear embossing powder.  It embossed wonderfully. Every little line and dot of that image is embossed.   The image is stamped on Stampin' Up Naturals White cardstock and colored with Copic markers.   I used s bit of Spica marker for the shimmer on the rim of Santa's glasses.   To finish off the stamped image, I sponge blended on some more color using Victorian Velvet Distress Ink and then distressed the edges.   As if that wasn't enough, these adorable little brads are holding the stamped image onto a background layer. 

All of the printed paper is by My Mind's Eye, Lost and Found Christmas collection.   The background layers are also have sponge blended with distressed edges.  I hit my ribbon stash for some miscellaneous satin ribbon.  Lastly everything is mounted on yet one more layer of Stampin' Up Soft Suede cardstock.   


Here are all four Santa's lined up.  Three of these are already on their way to JeniferD.  I held back my own copy.  


This photo is a tribute to the wandering creative mind.  I wrestled with a different gorgeous paper for a few days and just couldn't get the entire ideas together.  I even ended up smooshing some bottle caps and glazing the image with Glossy Accents medium by Ranger.   But I couldn't make it further.   So that Santa in the bottle cap and three more like it are now refrigerator magnets.

Thursday, December 13, 2012

Medallions of Wreaths

From the archives.   I confess... I've run out of new holiday projects to post for this December.   Well, I did have two more, but the digital pictures went to cyberspace heaven and I've given the card and gifts away.   So I'd like to revive one of my favorites from last year.

-----

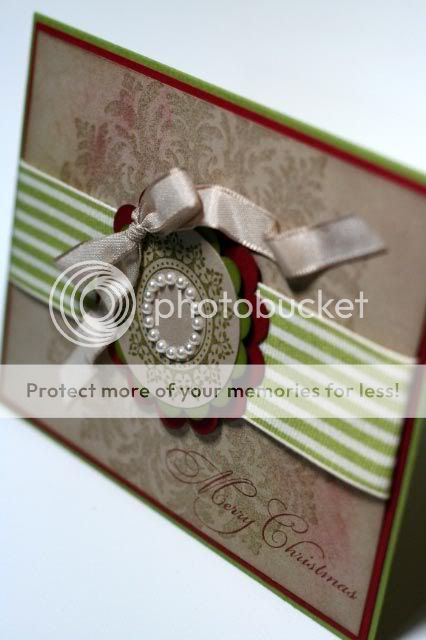
I made this card for my local Stampin' Up Demo, Chris Galbraith.   I love all of the creativity she shares with us gals all year long.  It was a pleasure to create something for her for a change.   Since the card is for my SU Demo, all of the products are Stampin Up.  


The inside has the same circle image that I used as the wreath on the front of the card stamped in clear embossing ink and then embossed with clear embossing powder.  It's very hard to see in a photo.   Note to self:  Next time I do that technique I'll have to pounce a bit of ink around it to make it stand out some more.

Supplies: 
Stamps: Stampin Up (Medallion, Vintage Labels, and All Year Cheer)
Ink: Stampin Up (Riding Hood Red, Crumb Cake, Old Olive)
Paper: Stampin' Up Cardstock
Tools: Stampin Up (Circle and Scallop Circle punches) 
Accessories: Stampin Up Ribbon (Crumb Cake Taffeta, Old Olive grosgrain stripe), Pearls

Inside of card: Stampin Up (Very Vanilla Cardstock, Riding Hood Red Classic Ink, Occasional Quotes stamp set, Vintage Labels stamp set), Versamark clear embossing ink, Clear embossing powder


Wednesday, October 31, 2012

Ghost Rider


Happy Halloween.   I was hoping to have this done to join the Bombshell Stamps blog hop today, but life was just too busy.   The challenge was to make a black and white Halloween card with one additional color thrown in.  As you can tell, that color is green for me.   


The motorcycle is stamped in black pigment ink and then embossed with black embossing powder.   I colored the image using Copic markers and had a time getting those green ghost flames to look decent.  


Supplies: 
Ink: Stampin' Up Craft Ink (Basic Black)
Coloring: Copic Markers
Papers: Neenah cardstock for stamping/copic coloring, K&Company (paper is glittered and embossed)
Other: Black Embossing powder

Saturday, September 15, 2012

Medallion Fall Thanks


Fall is almost upon us.   I can feel the summer heat starting to give way to more pleasant Fall breezes that want to come our way.   I'm ready for those cozy and comfortable Fall days to arrive.   

I just love medallions and this fall flavored medallion from Stampin' Up's Day's of Gratitude stamp set is just gorgeous.  In the card below, it's stamped with SU Classic ink, cut out by hand, and shaded with some ink and an artist's sponge.  Just abut every piece on this card has some shading.   

The card uses SU cardstock and SU DSP - Juntos.  The stamps used on the backgrounds are also fro the Day's of Gratitude set.   For the greeting I reached for another SU set - Afterthoughts.   The Thanks had an additional sentiment under it that I cut away.  Thanks to the cling mount stamp system, I can just add the additional sentiment to the block any time I want to use it.   The frame on the label is accented with a stamp from Four Labels.   The stamp actually had a bird on it as well, but I used a marker to color just the frame on the stamp and stamped that. Accents include a couple medallion punch shapes and some misc organza ribbon. 


Here's another version of the above.   For this one, I pulled out my Colorbox pigment ink.  The stamp pads are these great little petal shapes with a sharp point.  I used that sharp point to color the stamp.  Then after stamping the image, I embossed it using clear embossing powder.    The background is stamped and then embossed with an embossing folder from Tim Holtz.  

For the greeting, I used  a stamp from Lot's of Thoughts from SU.  I just inked the part of the greeting I wanted with a marker.  The frame around the greeting is from SU's Four Frames set. If you look closely, there's a bit of a shadow layer on the greeting created with two additional punched shapes.   The ribbon is Dusty Durango, bu SU.  The ribbon actually has polka dots on one side and I'm just using the reverse side.   Lastly, there's a little gold accent pearl in the center of the medallion. 


This third version is similar to the above.  the differences are a different embossing folder, but also from Tim Holtz and a different greeting (SU - Much Appreciated)


Thursday, August 16, 2012

Eclectic & Romantic

I just had surgery on my right hand this past Tuesday for carpal tunnel and trigger thumb, so I'm home recovering.  I'm getting more and more adept with my left hand, but not enough to do a lot of creating.  I do have pictures of cards and such from before I started my blog and now is as good a time as any to post some of those.


Here's a cardset I made using several Stampin Up stamp sets and My Mind's Eye printed papers.  The Stampin Up stamp sets are: Bliss, Artistic Etchings, Wanted, and Elements of Style.  Stampin Up Classic Inks are used for stamping and subtle shading on all of the cards.


The background printed paper is further embossed by stamping with Versa Mark ink and using clear embossing powder.  The SU Decorative Label punch was used on the greeting.  I used a Fiskars border punch on the bottom along with some scrunched up red seam binding.  The flower is from a mystery package that my aunt sent me.  She occasionally sends me boxes of things and I never know what's going to be inside.


The heart and scalloped border punches are from Martha Stewart.  Stampin Up's Curly Label punch is used for the greeting and SU's round scalloped punch is used for an accent piece.   Seam binding and some pearl accent finish up the card.


This card uses a border punch from Martha Stewart and some blue satin ribbon (unknown brand).


I used the same technique as on the first card to emboss the background.  Accents include a Prima flower, a pearl brad (probably from Paper Studio), and some seam binding.  The greeting is punched using SU's large oval and scalloped oval punches.


Wednesday, March 14, 2012

Creepy Critters Swap Set

This is the last page element set for my current swaps on Scrapshare.com.   Thanks to JenniferD for hostessing.   She does an awesome job and I'm always thrilled to be in a swap with her. The theme for this group is obviously Halloween.

The hat is stamped with black Stampin Up Craft Ink, embossed with black embossing powder and then cut out by hand, including the shadow layer.   The cat is an image I traced with Make the Cut and cut out using my KNK Zing. The border is done with a Martha Steward punch, some background layers and a spider cut with a Sizzlet die.  The printed designer paper is Basic Grey Eerie and the cardstock is Bazzil.


Thursday, January 5, 2012

Bombshell Hugs & Kisses (MOJO222)


I had a great time making this card.   A lot of different elements went into it.   I may end up using it as my hubby's Valentine's Day card.  


The gal on this card is a stamp from Bombshell stamps, stamped with Rich Cocoa Memento ink and colored using Copic markers.   The dress she has on was made with a cutting file that I also purchased at Bombshell stamps and I cut it using my KNK Zing and Make the Cut software.   Speaking of my cutter and software, I designed/created the medallion (Spellbinder like) cutting file in the background.   I love having the multiple shadow layers.

The circular/medallion stamp is from an acrylic stamp set from Inkadinkadoo that I picked up ages ago.  I cut part of the circular stamped image off to make it fit in the medallion cut out. For the greeting I used an acrylic stamp from Fiskars' Lasting Love set.  I stamped it using Stampin' Up Craft ink (Chocolate Chip) and topped it off with clear embossing powder.   Three of the four corners were trimmed with a Fiskars corner punch.

The hearts were punched with several punches including Fiskars, Creative Memories, and EK Success.   I used a Cuttlebug embossing folder on the red piece of paper in the back ground.   Additional accessories include adhesive red pearls from Paper Studio and Stampin' Up ribbon.  Throughout the project, I used Ranger/Tim Holtz Distress inks for subtle shading.   The printed designer paper is by My Mind's Eye (Lost and Found - Madison Avenue).  The card base is made from a piece of 12 x 6 Bazzill cardstock and misc cardstock was used on the card, most likely from Hobby Lobby. Stampin' Up dimensionals were added to pop some of the images off of the page.


Sunday, December 25, 2011

Penguin Nutcracker (Guest Designer)

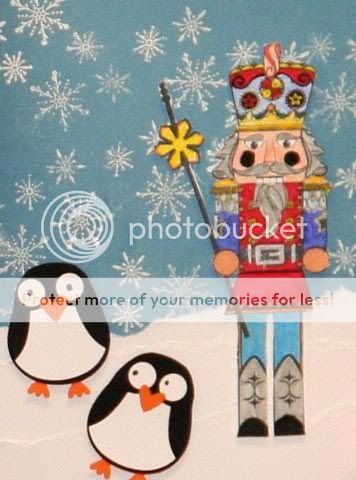
This card was designed and made by my lovely little elf, my daughter Angeline.  Angeline is seven and loves to craft.  She loves stamping and coloring.  She's even woken me up on the weekends asking me to stamp a few images for her 'cause she wants to color them.   

Angeline made this card for her teacher.   She had stamped, colored and cut out the nutcracker a few weeks back.  She wanted to use the nutcracker in her card.  She also liked these penguins,  I had made a card during a card class hosted by my Stampin' Up demo Chris Galbraith.   So we married the two ideas and here's the result. 


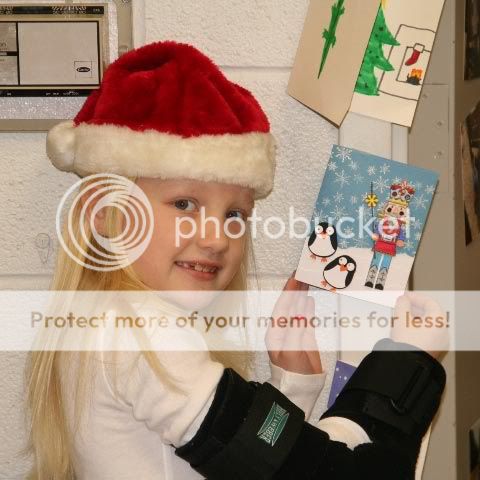
And here's a picture of Angeline with the card as it's hanging in her teacher's classroom. 


Supplies: 
Stamps: Recollections (Nutcracker), Stampin Up (Serene Snowflakes)
Ink: Stampin' Up (Basic Black Classic Ink and White Craft Ink)
Coloring: Zig markers
Paper: Stampin' Up Cardstock (Whisper White, Marina Mist, Basic Black, Pumpkin Pie)
Tools: Stampin' Up (Owl punch)
Misc: White Embossing Powder 

Technique Highlight:
The Penguins were made using the Stampin' Up Owl punch.  The ears and the feed of the owl were trimmed off. 


Friday, December 16, 2011

Oh Deary Deer

If you've been checking in on my blog, then this paper set looks familiar to you.  I put it to use with a few card designs this year.  I really love the red cream and black color scheme.  it's just classic and very rich.   And with any luck, you might not be bored of this paper pack just yet.   


Supplies:
Stamp: Stampabilities
Ink: Gold pigment ink, Colorbox liquid chalk
Paper: Paper Studio
Tools: Spellbinders, Quickutz
Accents: Ribbon, Gold bling stickers
Misc.: Gold embossing powder.

Tuesday, December 13, 2011

Scroll of a Tree


Supplies: 
Paper: PaperStudio, Misc Cardstock
Stamps: Stampabilities
Inks: Gold pigment ink, Colorbox Liquid Chalk
Tools Spellbinder Dies
Misc: Ribbon, Bling, Gold Embossing powder

Friday, December 2, 2011

Christmas Ornament Cards

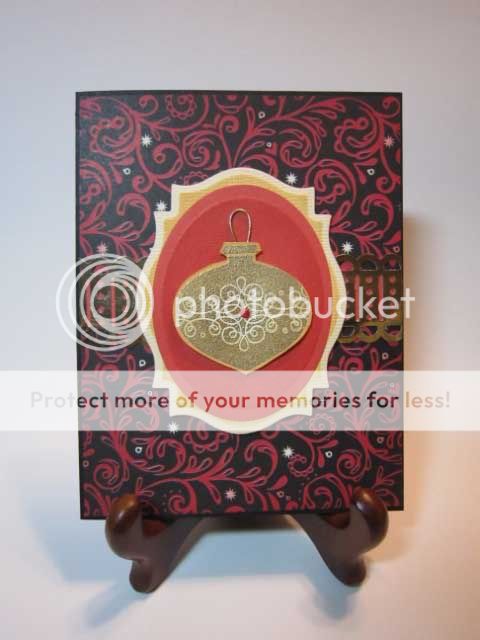
These are some cards that I multiples of.


Here's another version of the above card.


Supplies: 
Stamps: Stampin Up (Tags til Christmas)
Paper: Paper Studio, Gold paper from the art department
Tools: Martha Steward Border punch, Stampin Up Ornament Punch, Spellbinder dies
Ink: Colorbox Liquid Chalk Ink, Gold pigment ink
Accessories: Gold embossing powder, Stampin Up Elasti-cord, Bling


Tuesday, November 29, 2011

Embossed White Christmas Medallion


Supplies: 
Stamps: Stampin Up Medallion, Misc acrylic stamp for greeting
Ink: Stampin Up White Craft Ink
Paper: Basic Grey, Misc cardstock, Cranson Gold shimmer Paper
Tools: Stampin Up Punch
Accessories: White embossing poweder

Technique:
The card is pretty simple.  I used heat embossing for the stamped image and the greeting.  I stamped on a 6x6 piece of cardstock with Stampin Up White Craft ink, added white embossing powder and heat embossed.  I then cut the medallion in half, trimmed to size, and used the two pieces to create both cards.  
Related Posts Plugin for WordPress, Blogger...