Friday, January 25, 2013

Simply Love

I made this card a couple of days ago but am just now getting around to uploading it.  It's for the Retro Sketches Challenge #47 and if I'm going to submit, it's gotta be in before midnight.   Well, It's still before midnight my time. 

And thanks to Lyndal leaving me a comment below, I've also submitted this card for the Keep It Simple #6 challenge.   Thanks Lyndal.


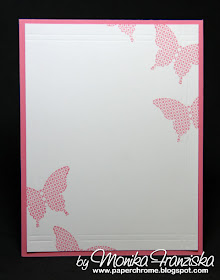
Inside of the card


Supplies: 
Stamps: Stampin' Up (Papillon Potpourri, & Seasonal Sayings)
Ink: Stampin' Up
Paper: Stampin' Up cardstock
Tools: Stampin' Up butterfly punch,  Stampin' Up Embossing  folder, Martha Stewart Score Board (for the inside of the card)
Accessories: Pearls

Sunday, January 20, 2013

Birthday King of the Road

Tuesday is my son's 11th birthday.  He'll officially be a "tween".   My young man has always had a head for cars.   I promise you, he didn't start playing as a baby until he had a car in his hand.   So when I saw that Bombshell Stamps is featuring their King of the Road stamp set each Monday of this month on the Bombshell Blog, it was a perfect fit.   What a great stamp set to use for my son's birthday card.

I stamped the antique hot rod three times using masking.   After coloring, I cut the back ground down using an exacto knife to where the cars run off of the white.   They're just roaring to go.


Here's an angled shot to show off the dimension.


And the inside of the card. 


Supplies: 
Stamps: Bombshell Stamps (King of the Road), Stampin' Up (Happiest Birthday Wishes & Circle of Friendship)
Ink: Memento (Tuxedo Black) Stampin' Up (Pumpkin' Pie)
Coloring: Copic Markers
Paper: Echo Park (A Boy's Life), SU colored cardstock, Neenah white cardstock
Tools: EK Success Border punch, Creative Memories and SU circle punches
 Accessories: adhesive nail heads

Monday, January 14, 2013

Baby Buggy Hello

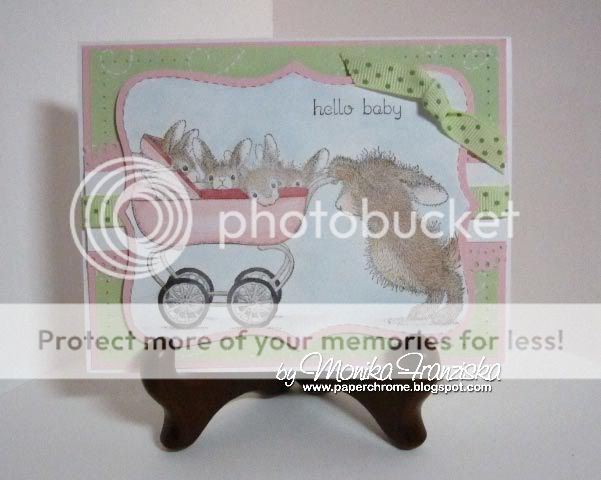
I made this card for one of my neighbors that was expecting a little girl. And this cad is perfect for this week's House Mouse challenge (HMFMC136) which is "new beginnings"   I can't think of a better new beginning than welcoming a little baby girl into the world.


Supplies:
Stamp: Stampabilities-House Mouse, Stampin Up (greeting)
Ink: Stampin' Up
Coloring: I think I used Stampin' Up Watercolor Wonder crayons and my aqua painter.
Paper: Creative Memories
Tools: Paper piercer, Stampin' Up (Top Notes die), Martha Stewart border punch
Accessories: Misc ribbon.

Thursday, January 10, 2013

Hot Air Birthday Balloons

This card was inspired by this week's Mojo Monday challlenge (mojo275).  Yes, I know it's Thursday night, but that's how it goes for this working mom.


The balloons were stamped in two steps.   The basket and balloon were stamped separately and then I glued the cut out basket to the back of the balloon.  Remember to leave a bit of extra paper at the top of the basket for this. 


I used masking to overlap the balloons and to add the baskets on the inside of the card.    The embossed dots on the left are created by rolling the cardstock with embossing folder into the machine a smidge and then backing it back out. 


Here's this week's MojoMonday sketch


Supplies
Stamps: Stampin' Up (Up, Up & Away)
Ink: Stampin' Up (Melon Mambo, Daffodil Delight, Pool Party, Soft Suede), Memento (Tuxedo Black)
Cardstock: Stmapin' Up (Melon Mambo, Daffodil Delight, Pool Party)
Printed Paper: Stampin' Up (Welcome Neighbor)
Tools: Embossing Folder (Cuttlebug - Seeing Spots)
Accessories: Stampin' Up (Steam Binding - Pool Party)


Saturday, January 5, 2013

Seriously Hot Wheels

This card is for the Bombshell Stamps January Sketch Challenge.   I used Bombshell Stamp's Piston Rebel set to create this.

 The image is stamped with Memento Tuxedo black and colored with Copics.   I did have to darken the stamped image of the motorcycle itself with the Copic Multiliners to darkent it.


The papers from 7 Gypsies (Venice 6x6) mounted on SU cardstock


The diamond plate is adhesive sheets of metal from Quickutz embossed with a Tim Holtz/Sizzix embossinf folder and treated with a smidge of Tim Holtz alcohol inks. I had the background more grungy and distressed looking, but ended up decidingon a cleaner look and cleaned much of the ink back off just leaving a twinge of color. 

And here's the inside of the card. 


Now when I handed this card to my soon to be 11 year old son last night, he went WOW... wow mom.  WOW, this is awesome.   LOL.   I guess I have a hit in his eyes.  


And here's the sketch from the Bombshell Blog.  I ended up leaving off some of the accents as I couldn't find anything that fit perfectly.   I chose to keep the card with just the main elements of the sketch. 


Wednesday, January 2, 2013

Happy New Year Diva

Happy New Year or Happy Birthday.  This gorgeous darling does the trick. The card itself is a bit of a trick.  It's a tri-fold card with a clear acrylic layer at the front.


The first layer of the card features the gorgeous diva from Bombshell Stamp's Butterfly Queen set. She's just gorgeous and makes me yearn for the body I used to have in my younger years.  The acrylic layer is adhered to one of the cardstock flaps.  To hide the adhesive, I added a border and then another one on the other side for balance.   


In the shot above you can see the layers folded out.   The second layer is created with a stamp from Bombshell Stamp's Pin Stripes set.  It's colored with Copics in an art deco style. 


On the inside I stamped the same pin stripes image using a stamp off technique.   You can just barely see it behind the Butterfly Queen.


and lastly, a shot with the card laying down.  You can see the neat effect of having her on that clear layer in front of the pinstripe/art deco layer.   


Supplies: 
Stamps: Bombshell Stamps (Butterfly Queen and Pin Stripes)
Paper: SU Cardstock, Acetate
Ink: Memento
Coloring: Copics
Tools: Martha Stewart border punch


Tuesday, January 1, 2013

Happy New Wine Glass Charms

Happy New Year.   

The Bombshell Stamps December blog hop got pushed out a bit to make room for the holidays.  However, in the holiday spirit, the theme is "Make It a Gift." Given that the new year is upon us and I might just need to be able to locate my wine glass among the others in the room, I chose to make some wine glass charms.

This first set of charms uses Bombshell Stamps' Harley Bikes set.


 The image is stamped on 1 3/4 inch punched circles of Shrinky Dink material using Stazon' ink.   I then colored it on the revers side using Sharpie markers. Here are a couple of close ups.


My daughter helped me with a second set made with the butterflies from Bombshell Stamps' Queen Butterfly set. 


I think the butterflies turned out even cuter than the motorcycle ones. 


BLOG ROLL -
Thank you for visiting and hop on to the next blog.